

Skagit Island Counties Builders Association! This was the kitchen that I did for my neighbor in Anacortes! The Contractor was “True Bearing Built”- my 3rd project with them- great contractor to work with!
WHIDBEY ISLAND REMODEL- 1 year to finish

When you don’t have lot of space and want a jetted jacuzzi tub and a shower, this works! It is a 48” long Japanese Style soaking tub that has really powerful jets- not those tickling bubbly ones that do not get into your sore muscles. Have done 2 projects with this tub and everyone loves it. 30” deep. EMPAVA EMPV-48JT11

The tub faucet is built into the lip of the tub with the controls and an integral sprayer to wash down the tub after use- very handy! The wiring is a bit tricky. The contractor did not look at my drawings when installing the cabinet handles and put the lower drawer handles in the middle of the door panel instead of at the top. This means that one has to bend down another 6 inches and practically touch your toes to open a drawer- ugh! My pet peeve! Please try to catch your hardware installer before they make this mistake….once the holes are drilled, it is over. You can patch the holes, but a divot will always be there.

The Laundry involved adding a skylight, changing flooring, adding cabinets . Much more functional with storage to put stuff and a folding counter.

Nice new shower in the Guest Bathroom!

New media cabinets with pull out drawers for an extensive record collection! Equipment hidden behind screened doors. Again, cabinet pulls are mounted in the center of the doors instead of a the top of the doors! The older that you get, the harder it is to bend down:-) No patching those holes now…..these cabinet installers are likely on the construction crew, do not look at the drawings, and are told to install the hardware….do I sound picky? God is in the details, as Ludwig Mies van der Rohe used to say!
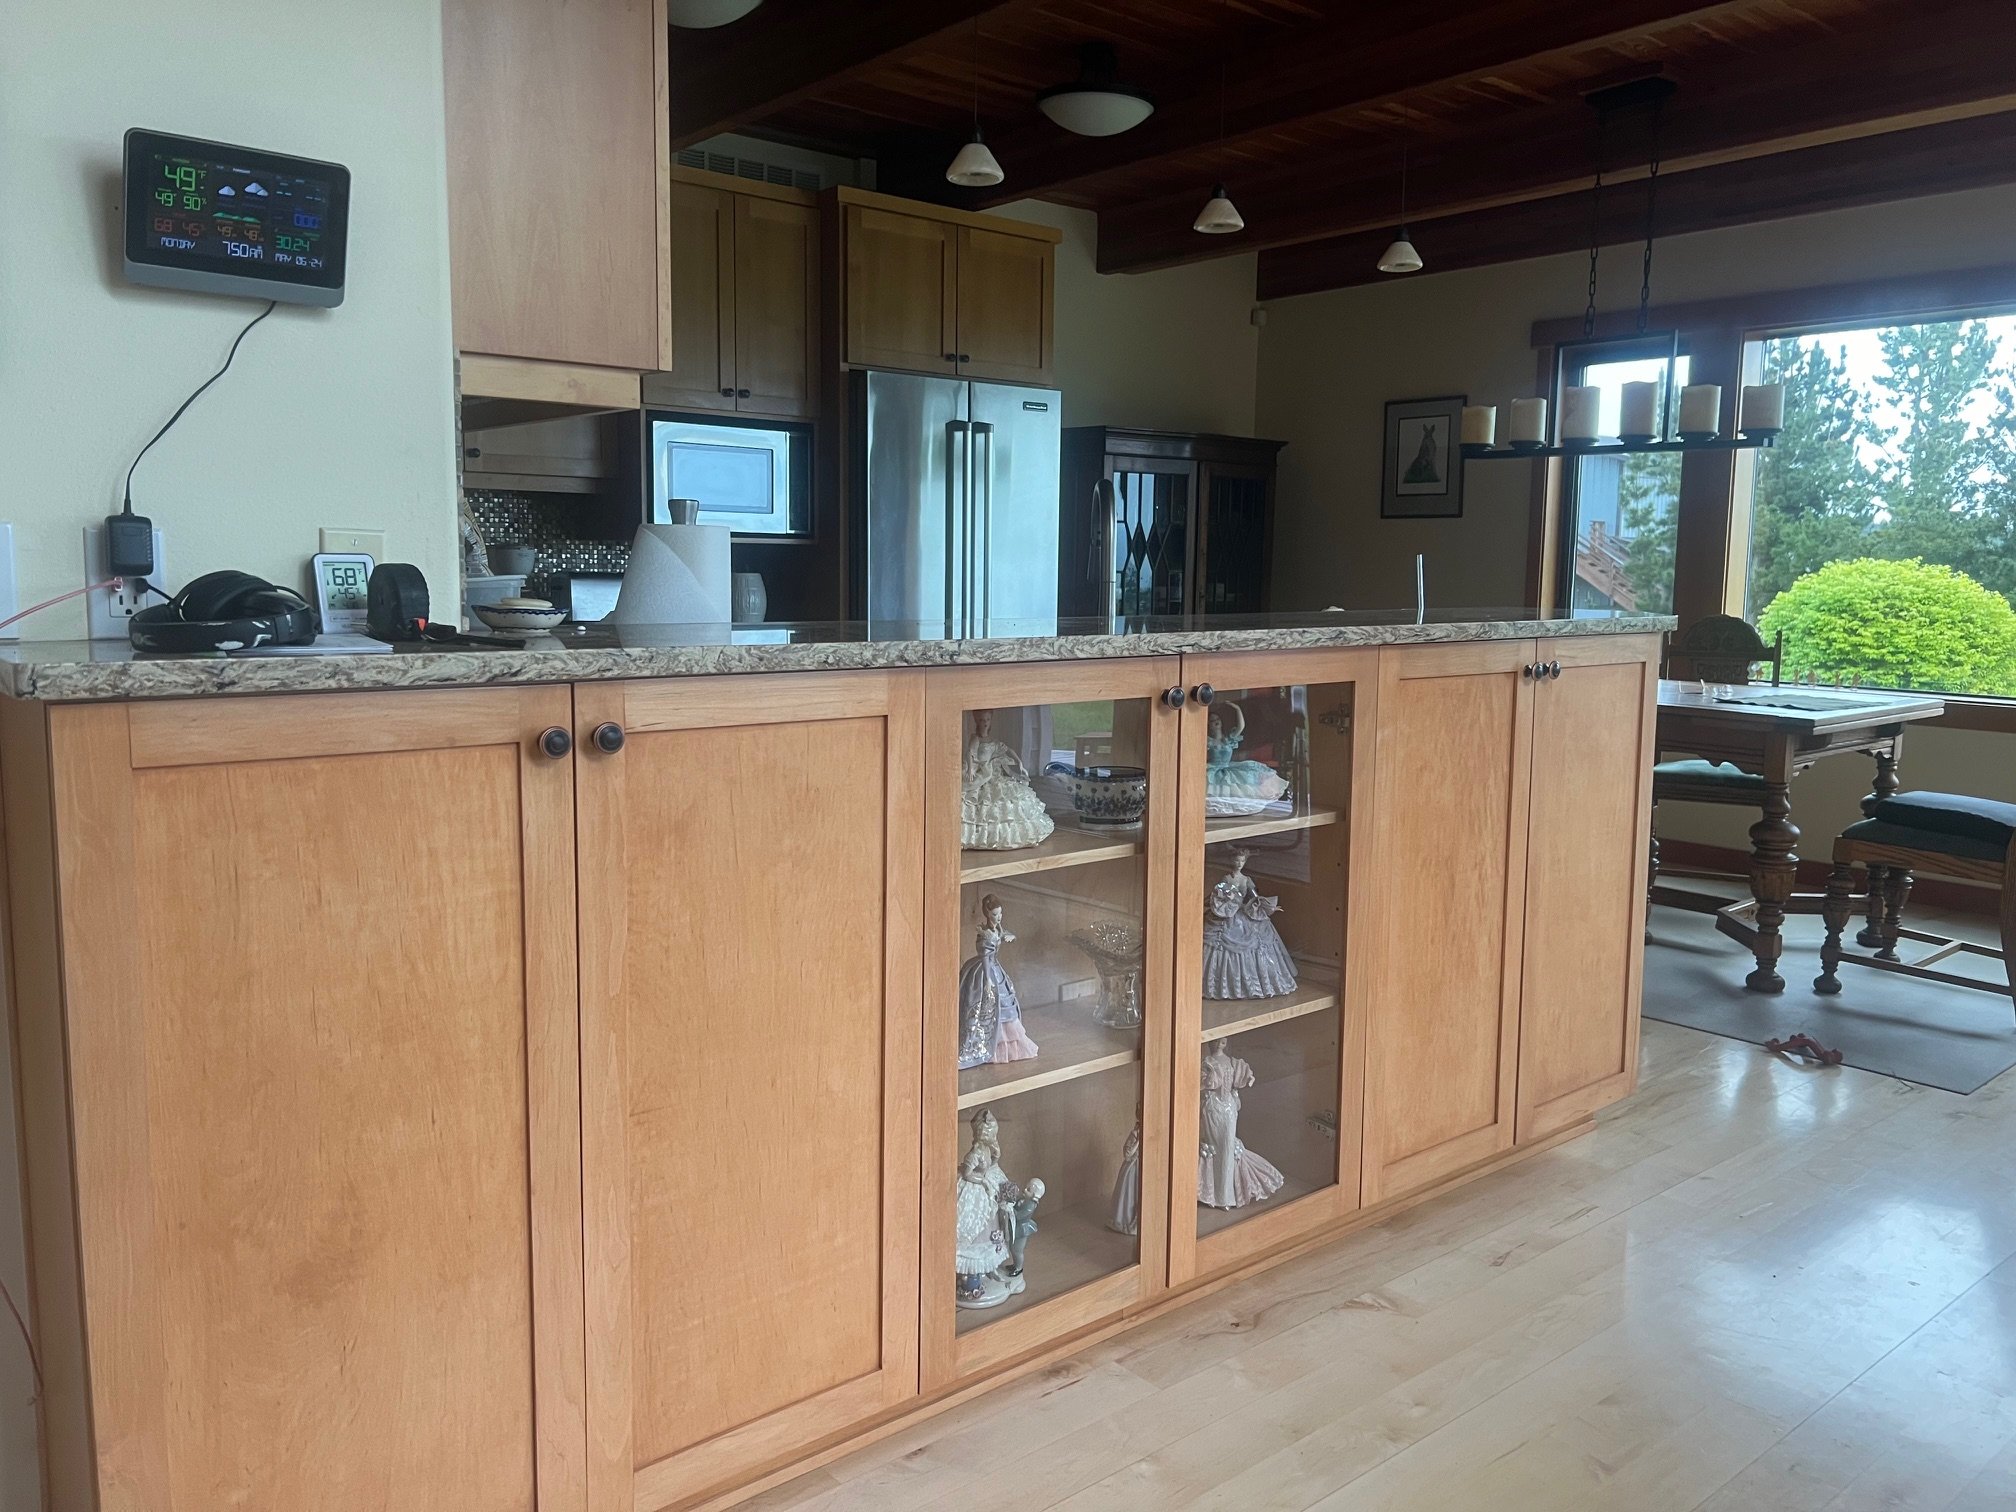
Kitchen needed more storage, so the space under the overhang with filled in with cabinets. Easy fix! And people can still gather there.
KITCHEN & BATH MAKE-OVER IN ANACORTES, WA.

This was a challenging existing space with many 45 degree angles. I was determined to get rid of the 45 angles in the cabinets and not ditto them as the previous design had done.

Kitchen “AFTER” uses rift cut Oak Cabinets from “Smith & Vallee” in Bow, WA. Photo Credit- Damian Vines Photography.
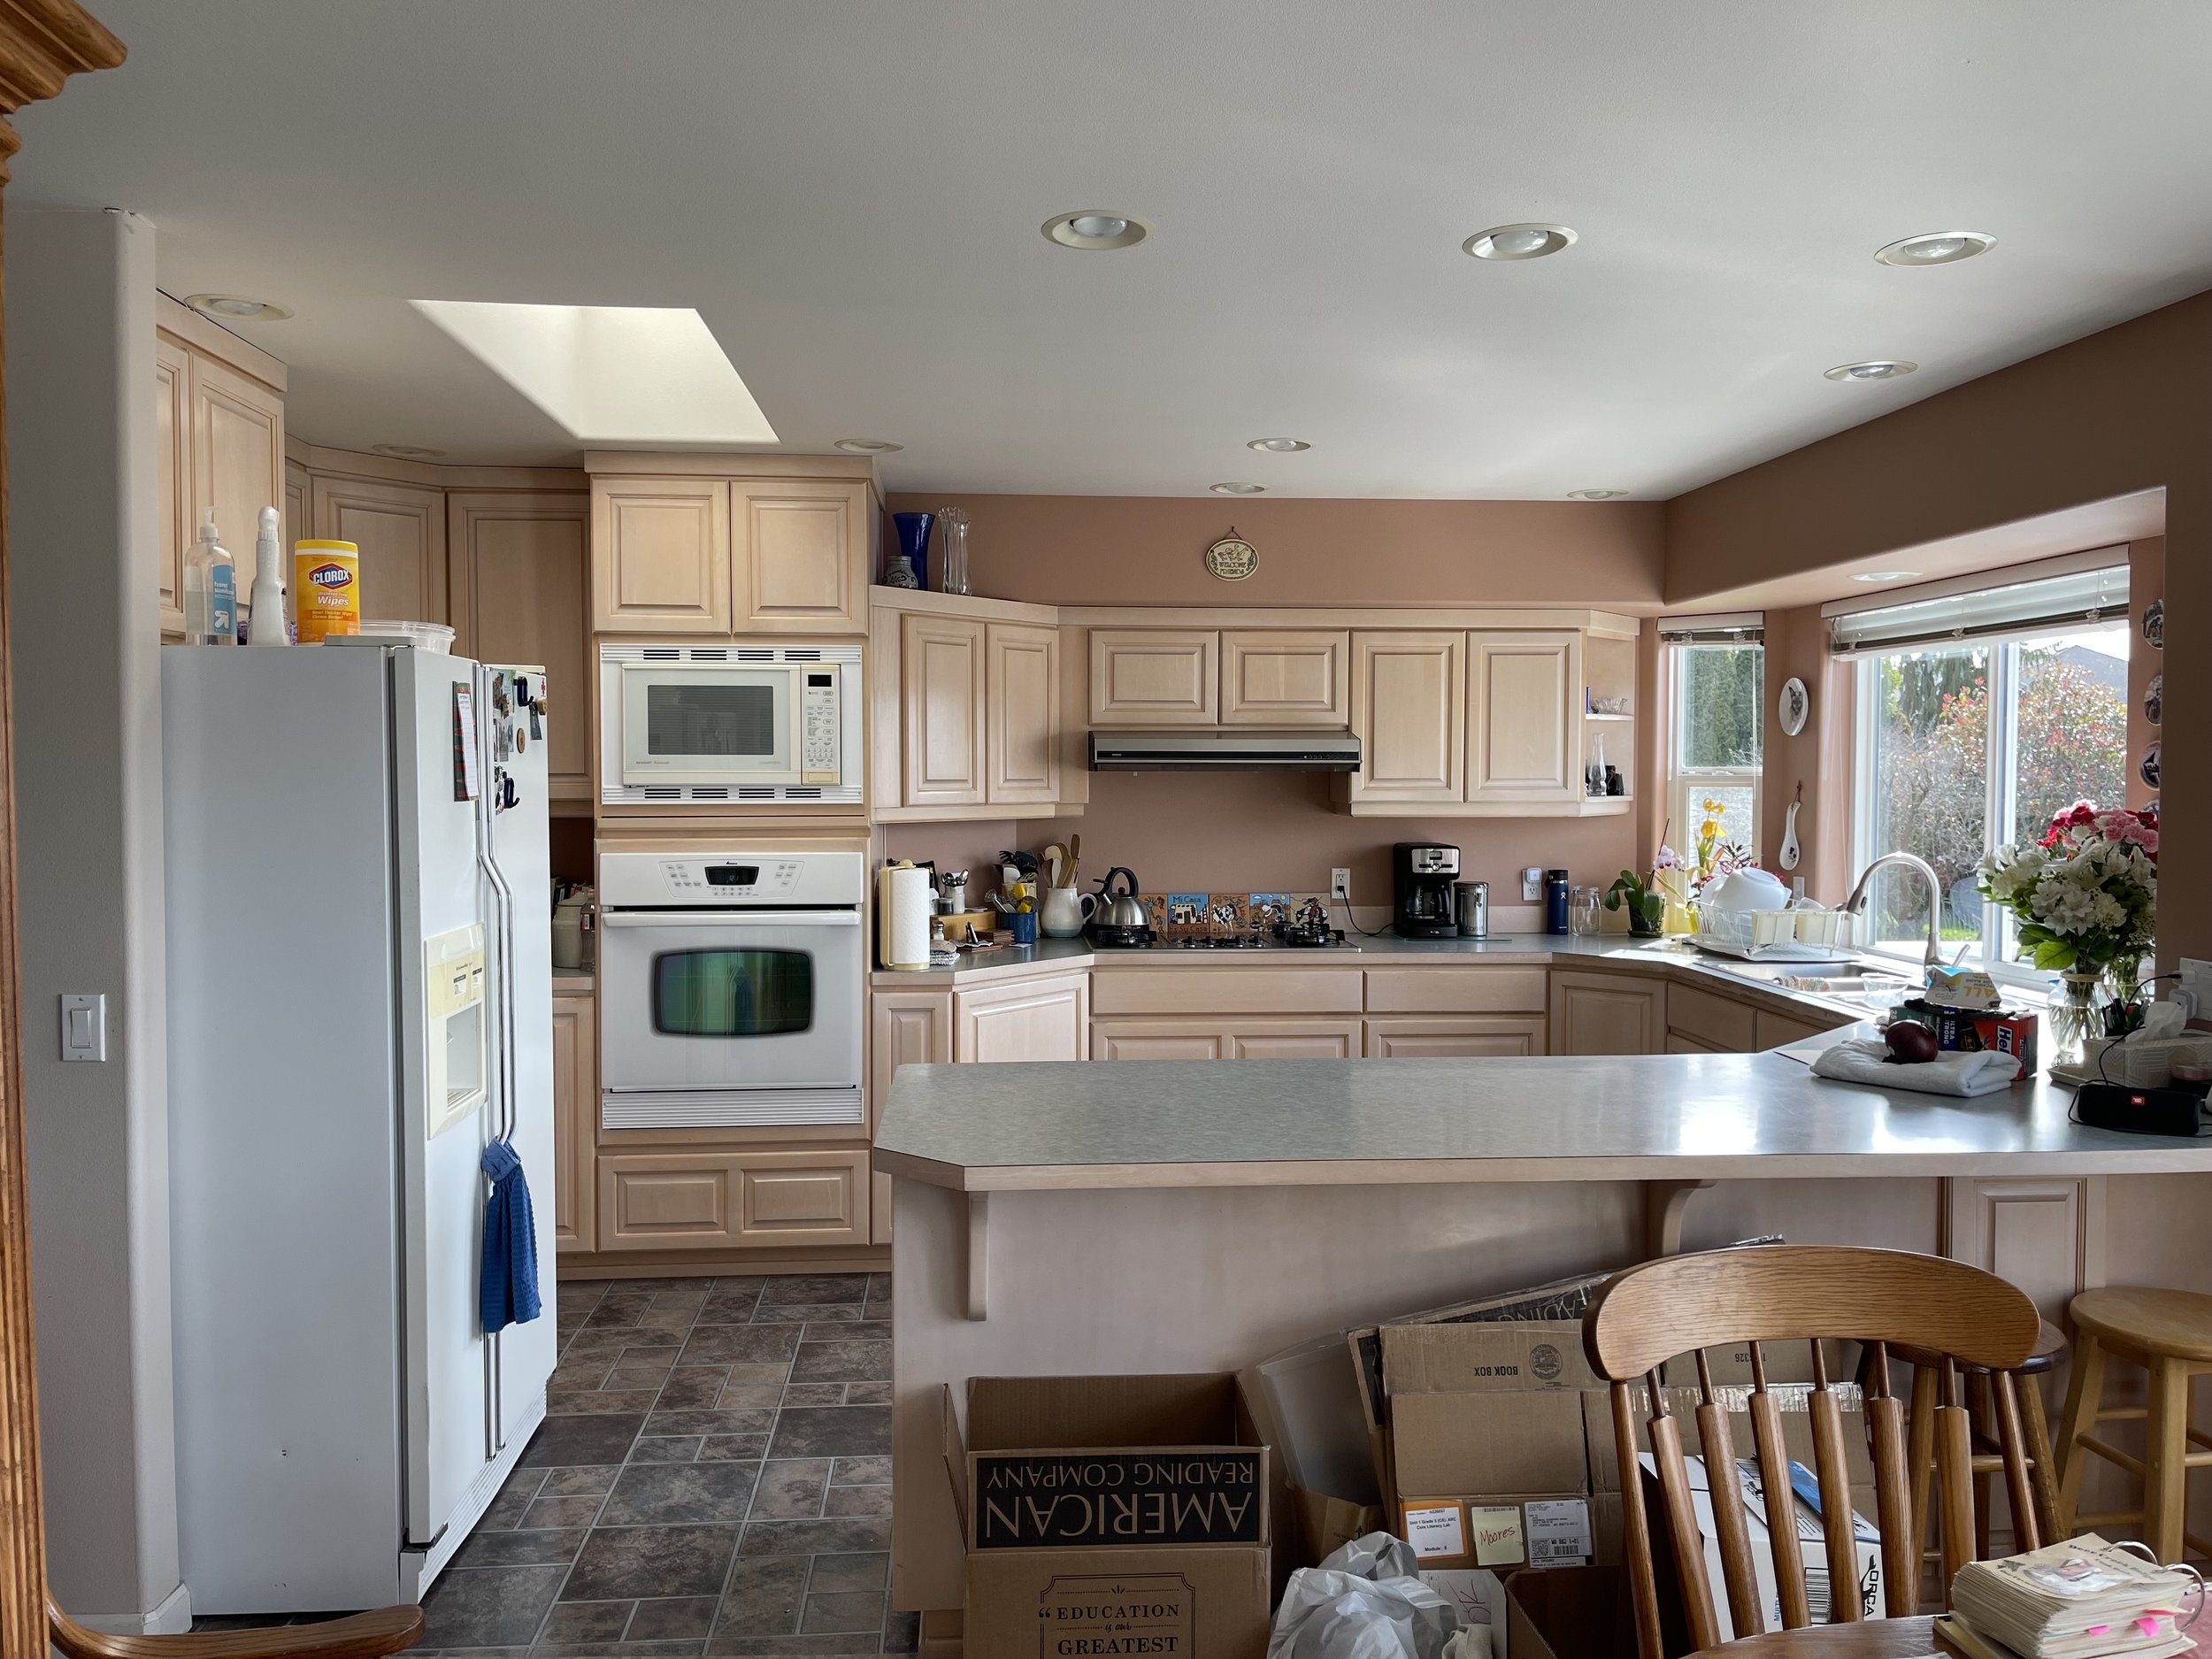
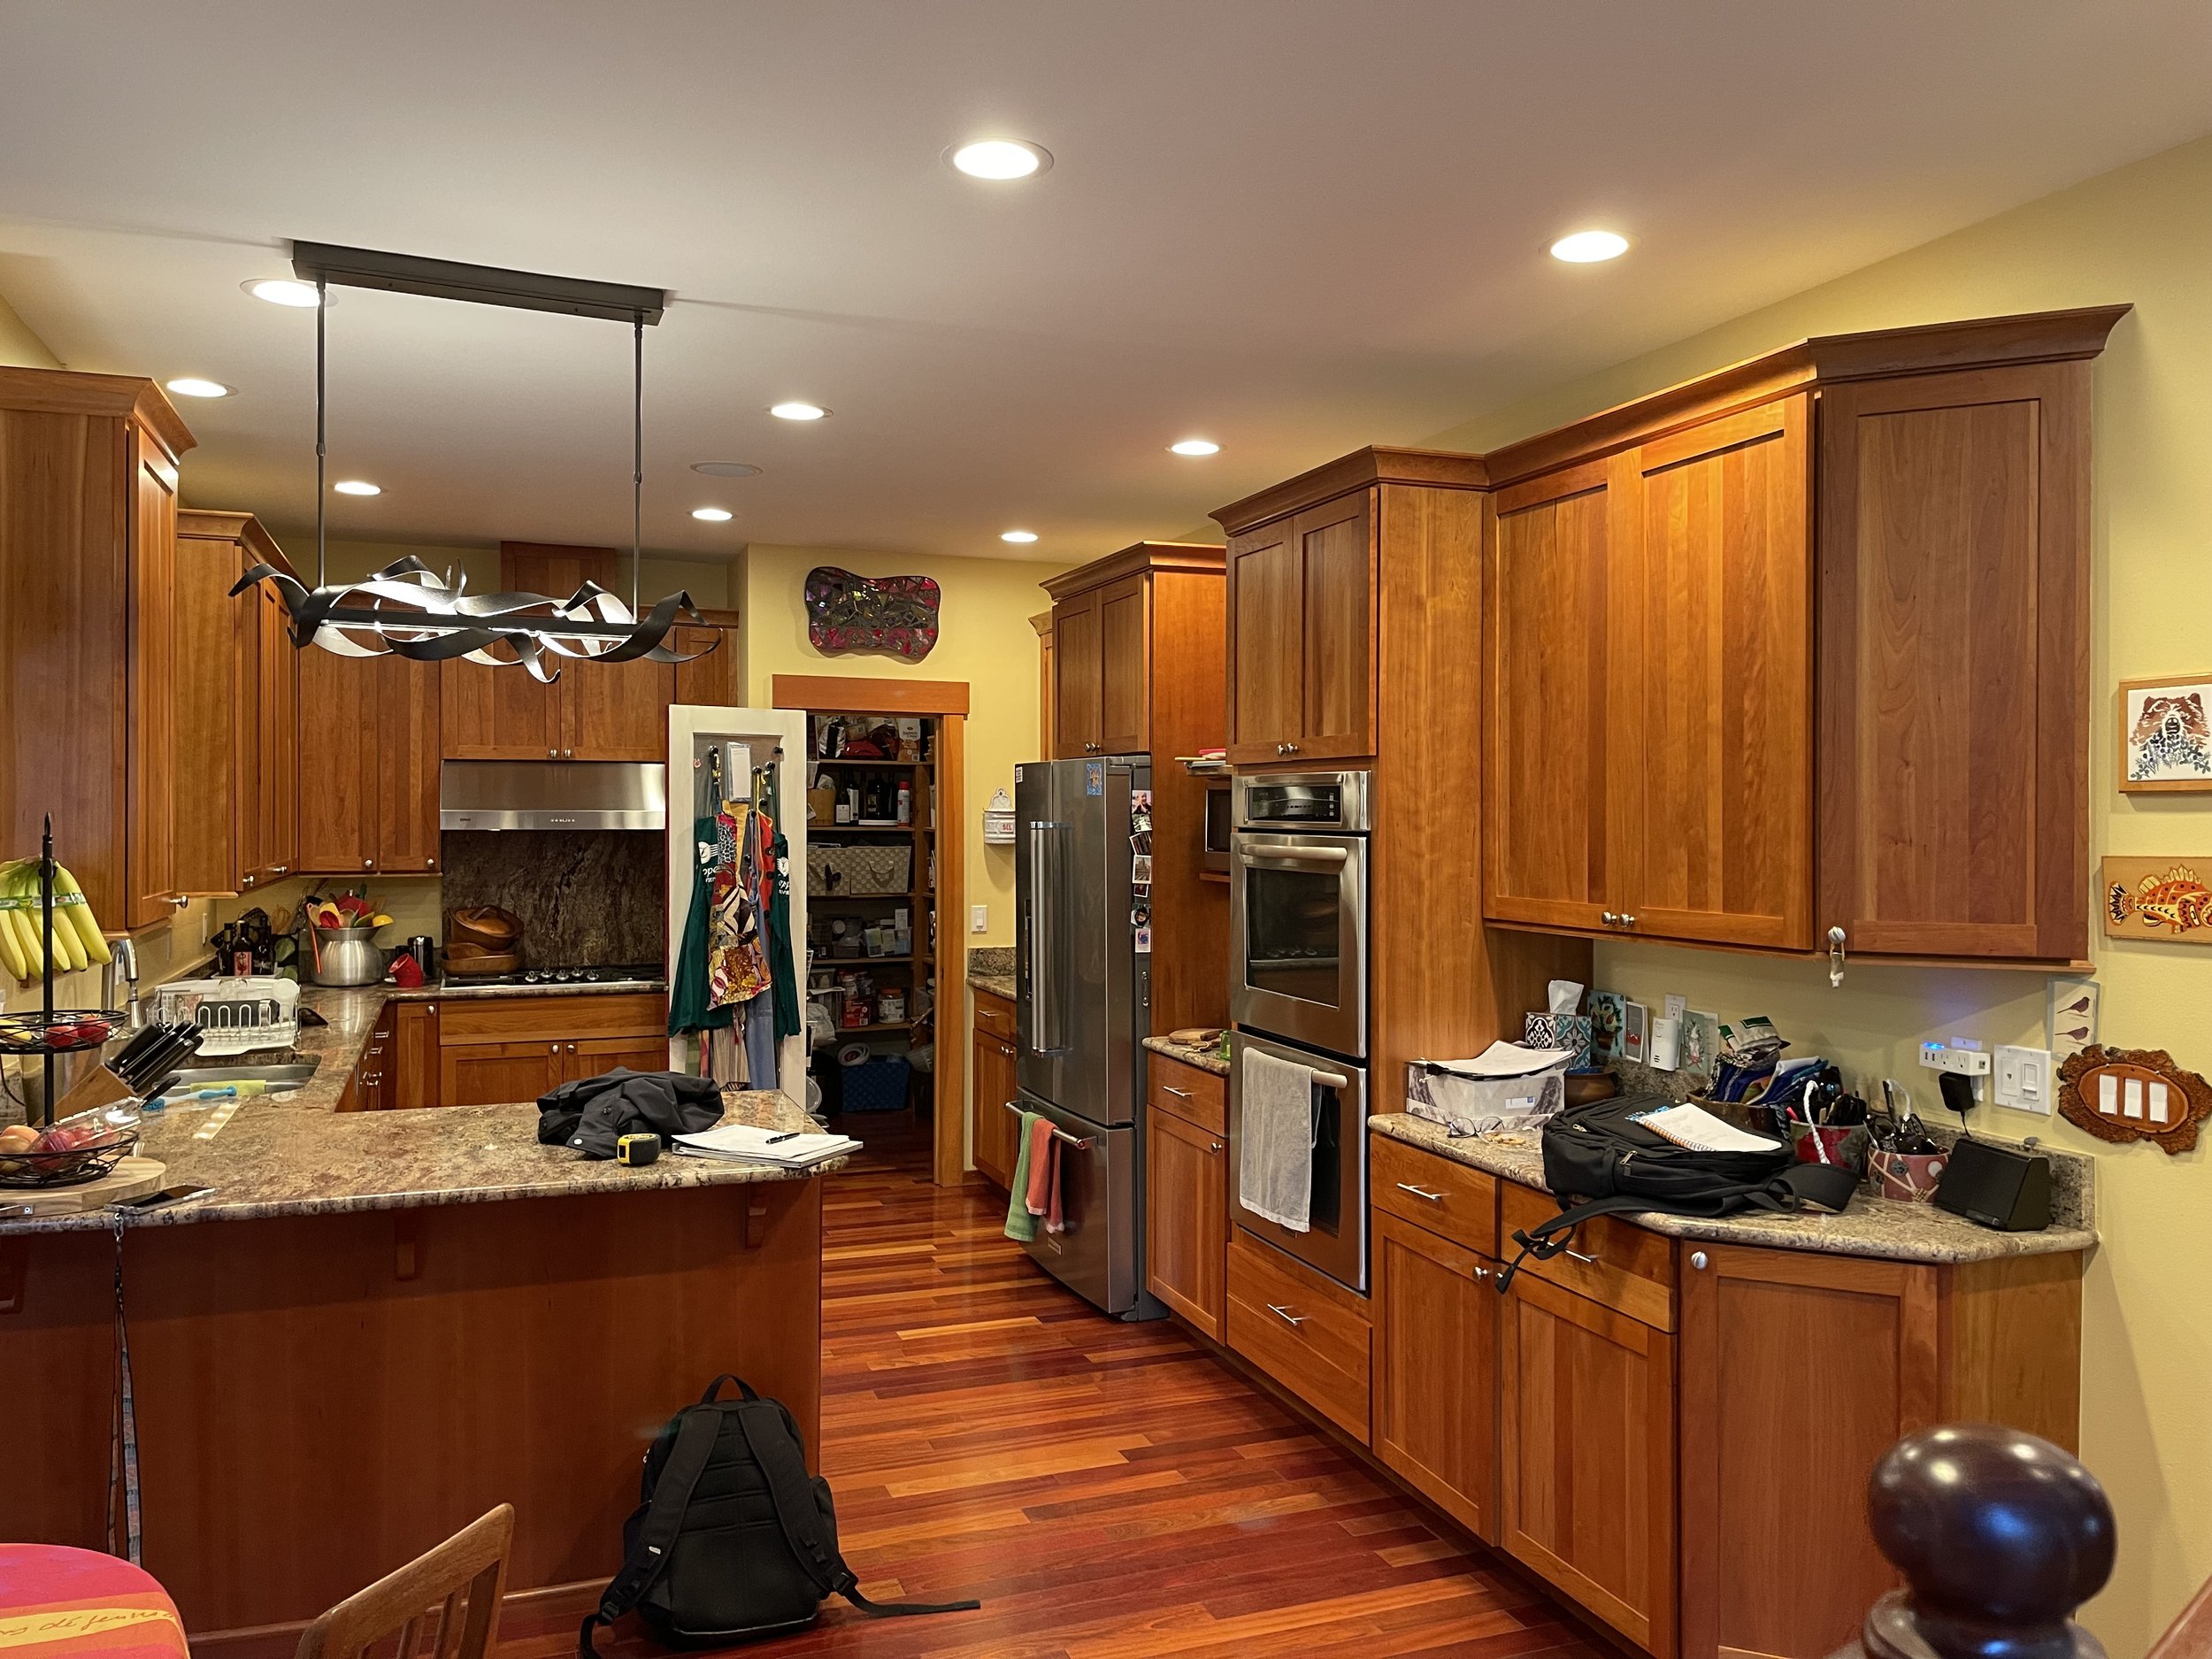
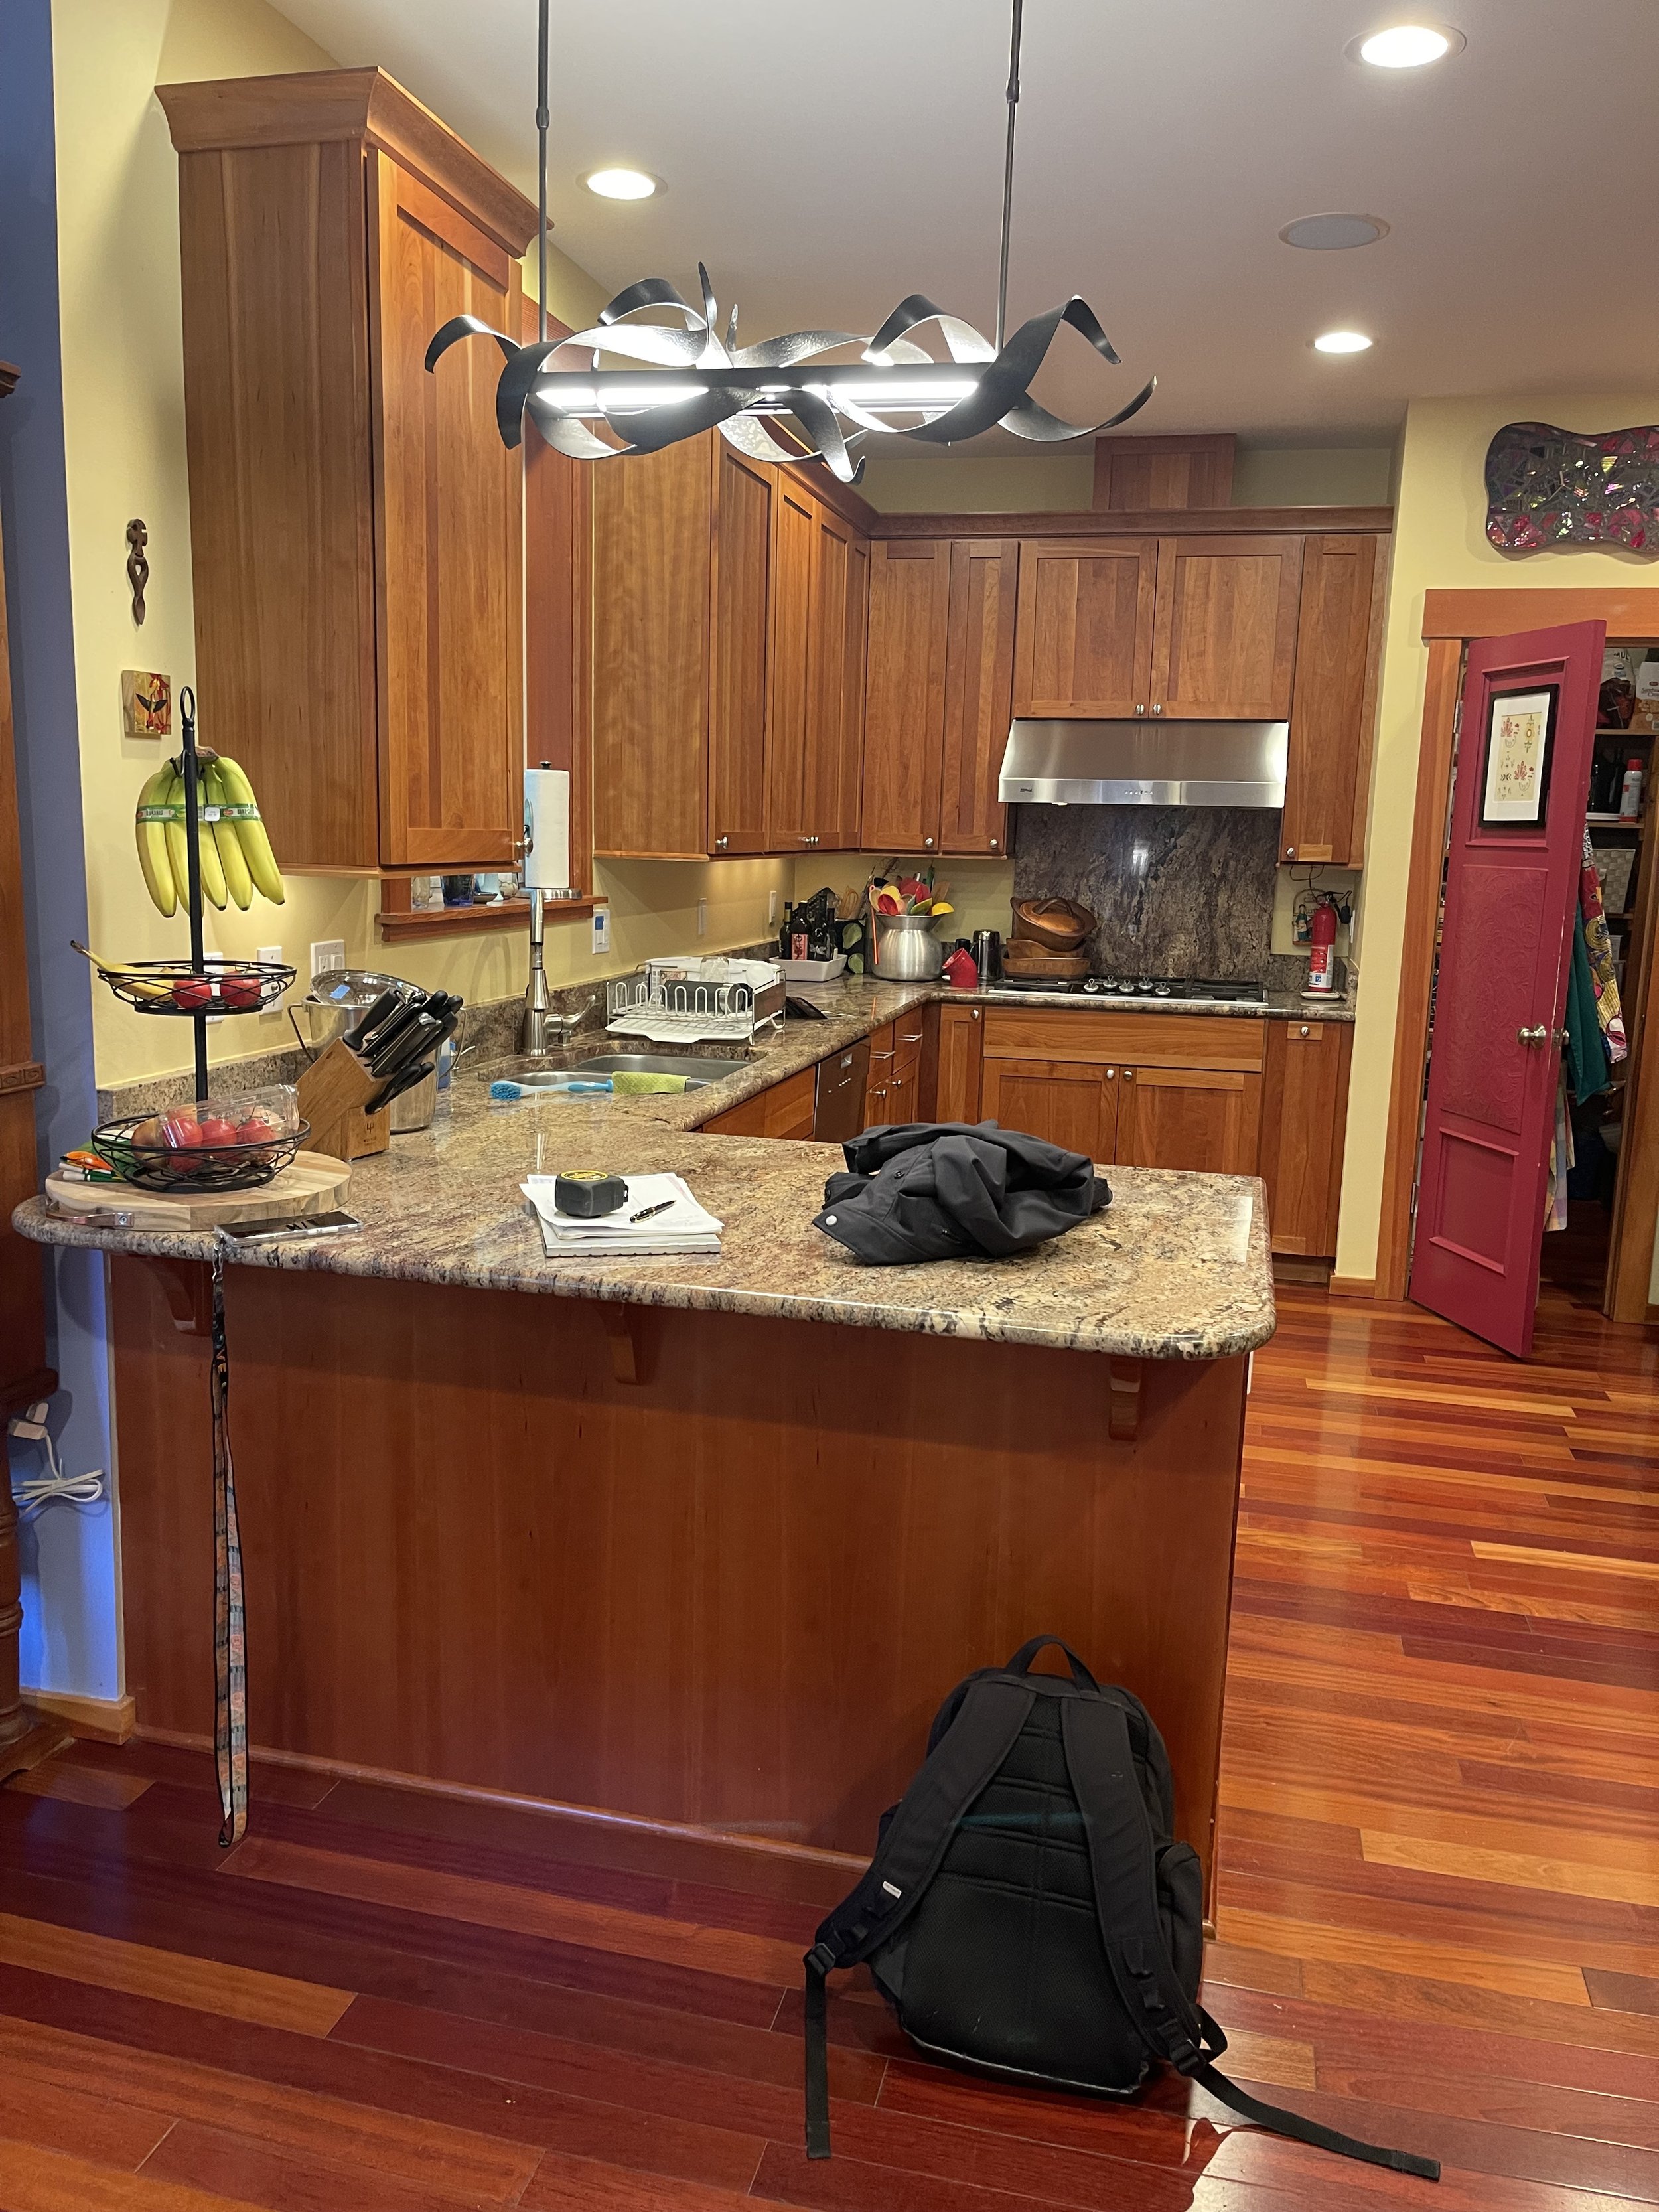
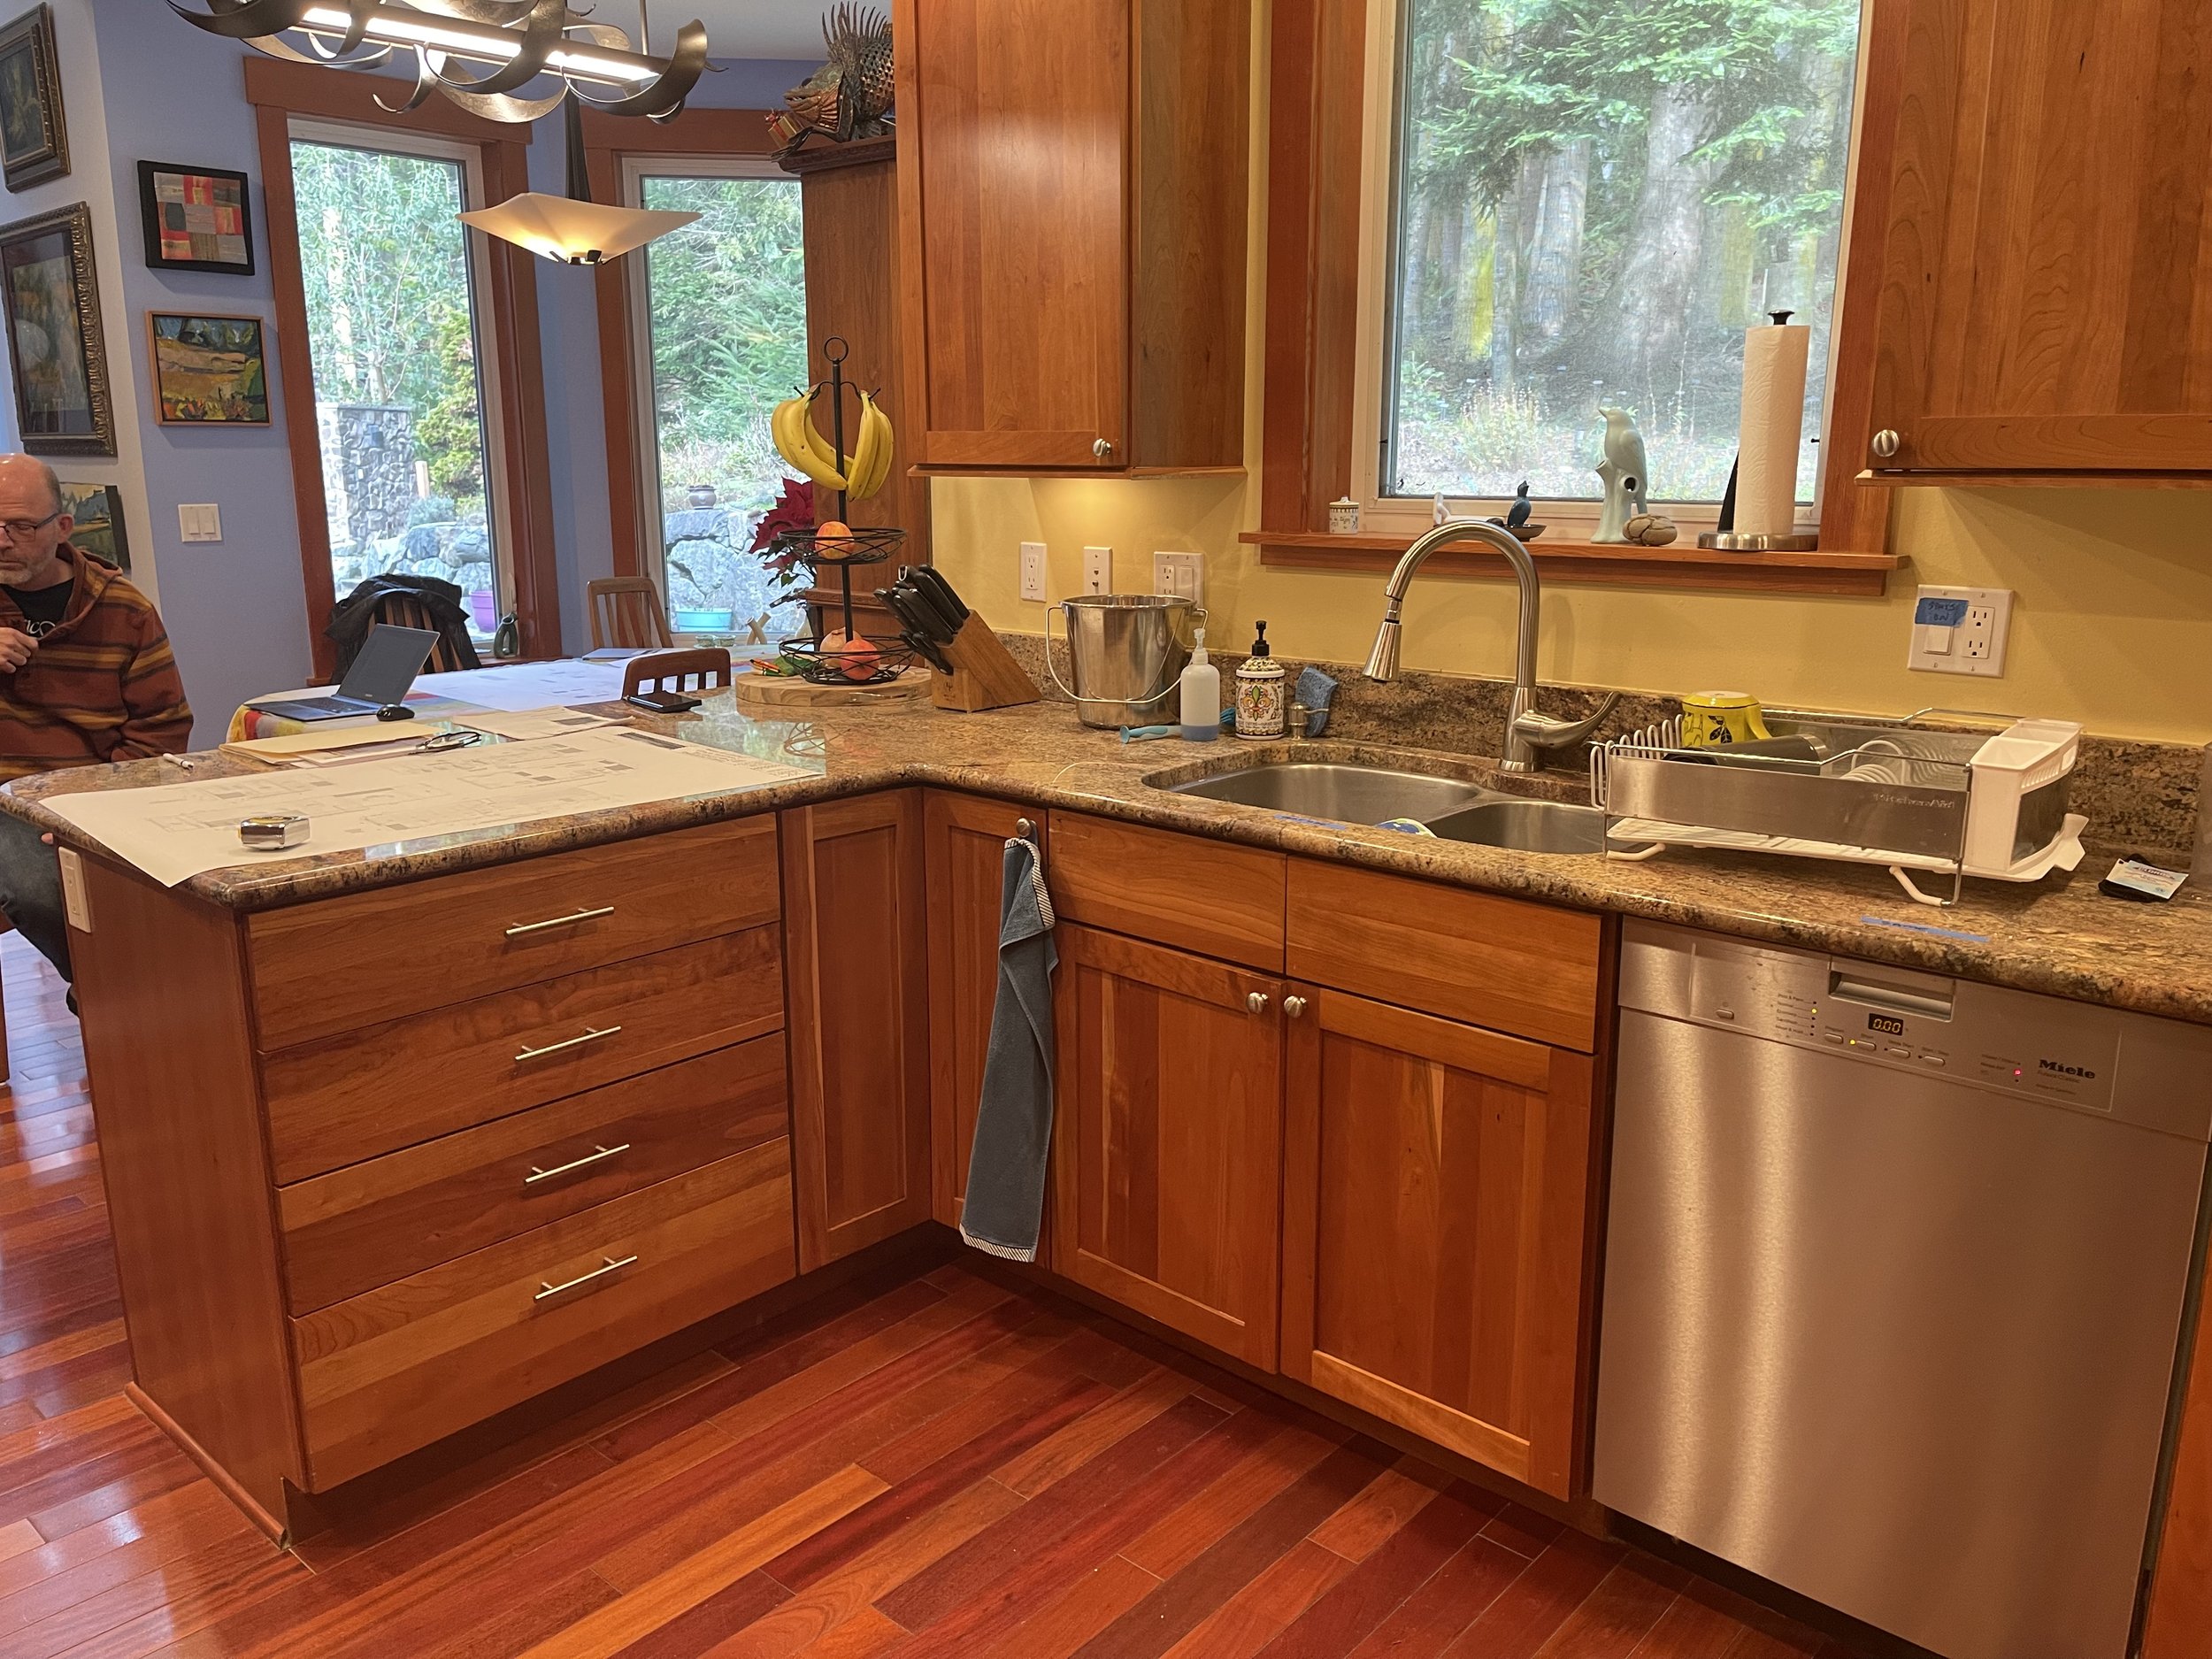
The Kitchen “BEFORE” had angled cabinets everywhere and a refrigerator that took center stage. We moved the stove to the peninsula, moved the refrig. and kept the sink where it was.
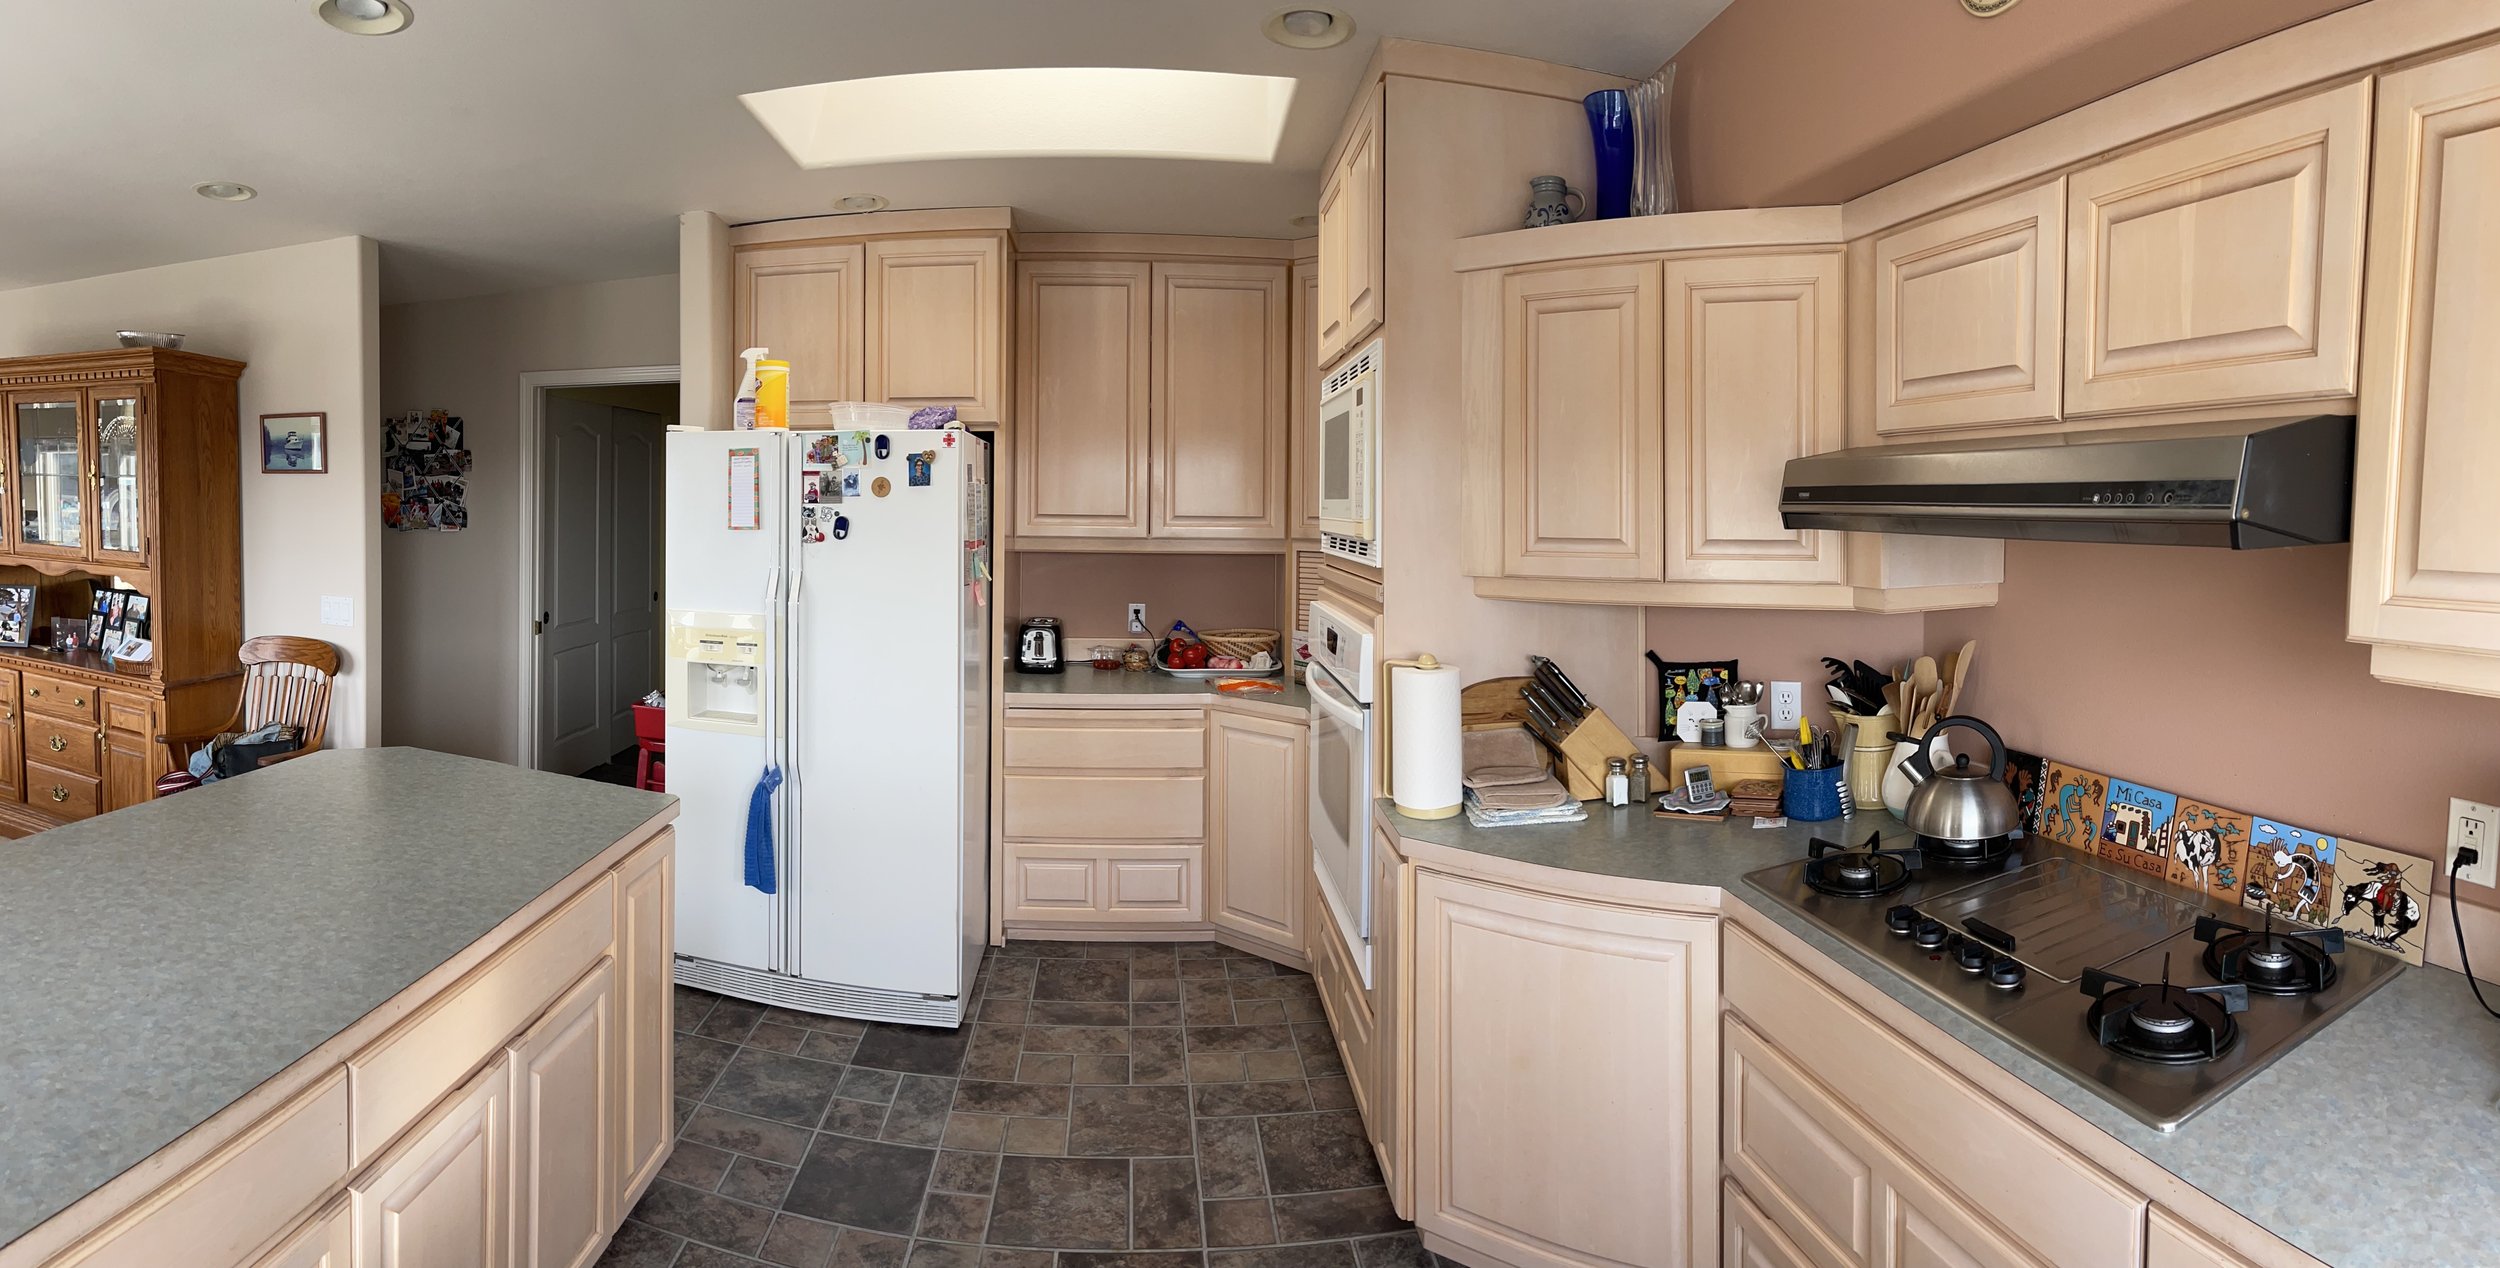
The Kitchen “BEFORE” had a weird corner area to the right of the refrig. with more angled cabinets, even in places where the wall did not angle.

Kitchen “After” backsplash detail is glass mosaics that go well with the Quartzite counters. The gas stove was supposed to have a pop-up downdraft, but there was a structural member in the way so had to go with an over-head fan. New doors go out to the deck, where there once was a picture window.

AFTER- New Master Bathroom utilizes that existing space much better then the old design with flanking storage cabinets.

AFTER- The backlit Vanity Mirror really floats off the wall and adds good light at the same time.

The Master Shower ”AFTER” features a pre-fab shower base, a bench under the shower head, glass tiles (from Home Depot, no less) and a glass enclosure. The free-standing tub replaces a huge tub deck that took up most of the bathroom before. This is very light and airy.
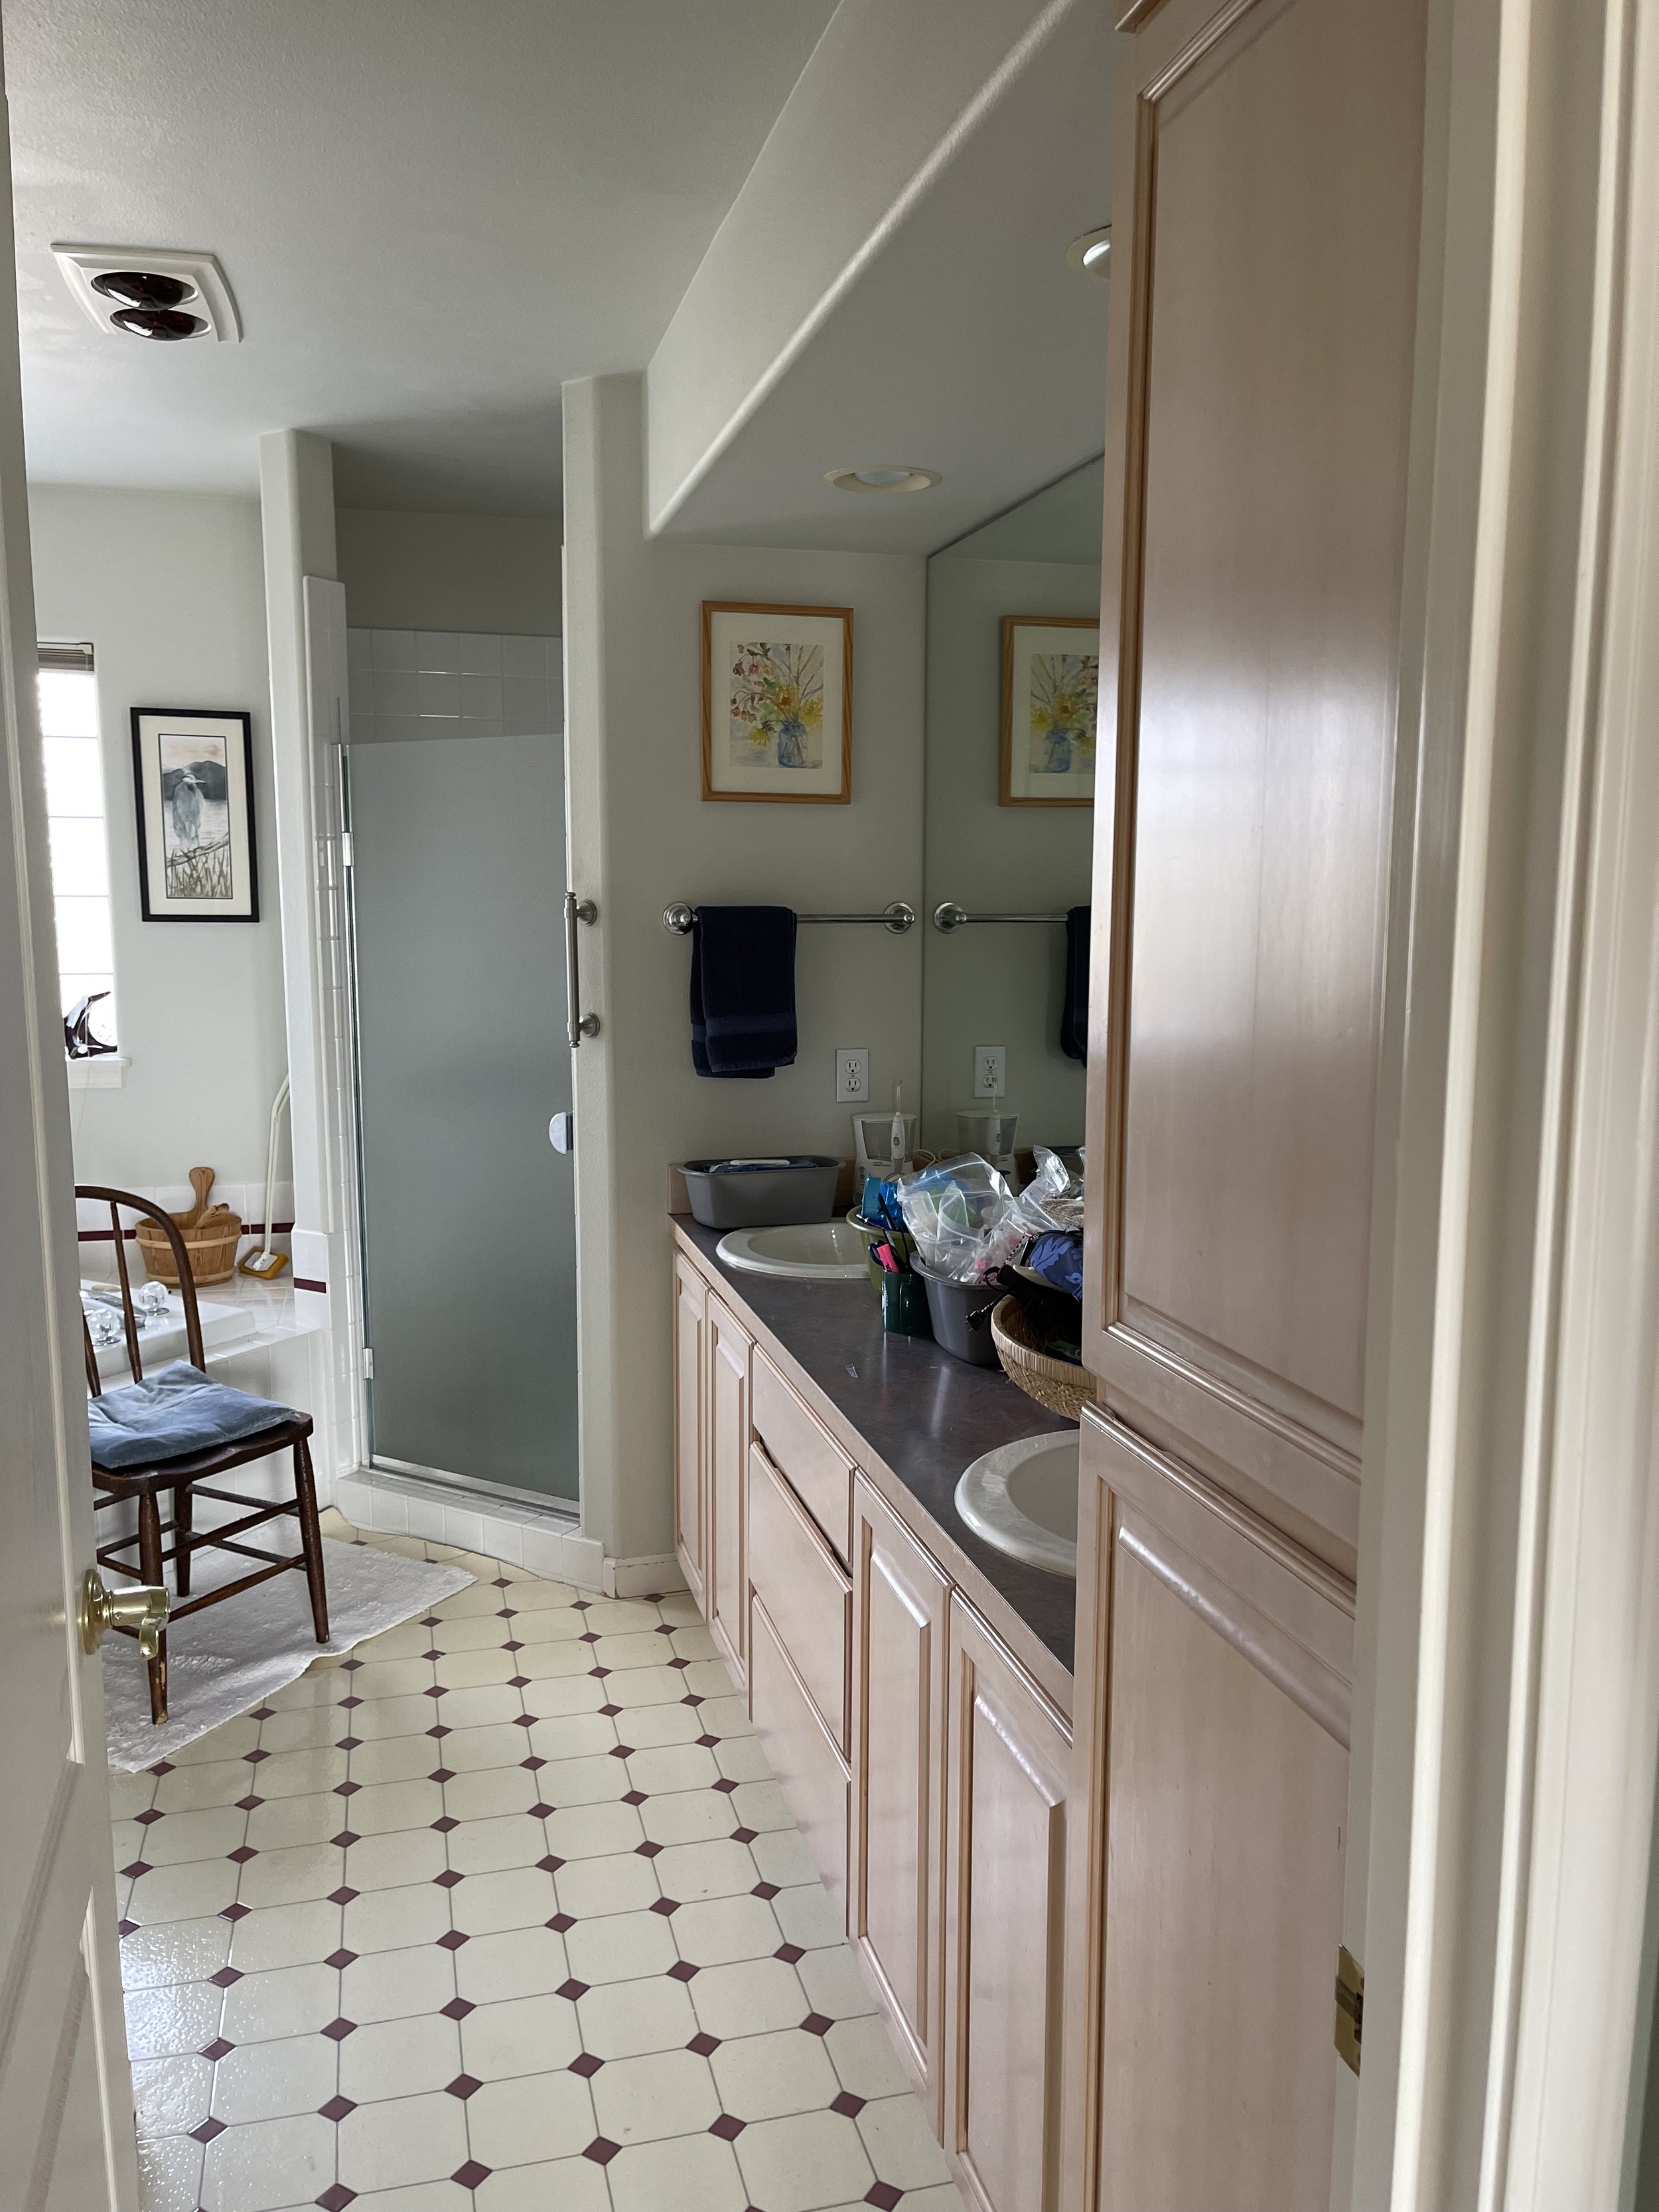
Master Bath BEFORE had 2 sinks, an enclosed shower.

Master Bath BEFORE with huge tub deck. Very dated looking and not a good use of space.
CONTRACTOR = TRUE BEARING BUILT CONSTRUCTION (This is my 4th kitchen/bath job with them- they really keep the clients informed on weekly progress with reports that are very helpful)
ORCAS ISLAND RETIREMENT HOUSE- PRELIM. MODEL

A couple from California hired me to help them with their Retirement House on Orcas Island. The caveat was that I had to work with a retired building designer who hand drew all of his plans, elevations and sections in PENCIL. When I finally got his drawings, besides being very hard to read- (scans of pencil drawings-yikes), I could not get the big sloping roof to work from the 2nd floor down to the 1st floor as one slope. If I shortened up the 2nd floor, then I could get it to work.

Well, one thing led to another and I wound up doing a little re-design. He had the Master Bedroom on the 2nd floor and I think that all that I’ve read on “Aging in Place”, that the Master Bedroom has got to be on the FIRST FLOOR. SO I moved the Master Bedroom downstairs and put the 2 bedrooms upstairs.

Then the other issue was the Laundry room was tucked under a staircase landing with 7’ headroom and room for just stacking washer/dryers. No layout area, no linen storage. I flipped the laundry to the front porch with its own side door for their dogs, linen storage, side by side washer/dryer, sink & counter.. None of these changes went over well, so I wound up calling it quits. They held firm to the design that did not work, the roof that did not work, with no collaboration .

I could not put his design on my stamp, that was the bottom line. I have standards and that was that- had to fire the clients. This is very rare for me to have to do and I do it with a heavy heart. But it would have been a great house- let me know if you have a lot to build it on? 3 bedroom, 3 baths, really nice laundry off covered porch. Great covered outdoor seating area outdoor fireplace! Aging in Place! Passive Solar!


This is my favorite shot illustrating “Passive Solar Design” with a big South Facing bank of windows that form the window bench for the Dining Room. My re-design basically took the best elements of the other guys design and added Passive Solar- because this site is in a Forest, so it gets very little light. I was trying to capture that Southern Light for those cold winter months when every more bit of light is so much appreciated.
FIDALGO ISLAND KITCHEN REMODEL FOR ARTIST COUPLE

It is my honor to be able to work with Josh Williamson of TRUE BEARING BUILT CONSTRUCTION on another project! The clients are both amazing artists and the centerpiece of the kitchen was all about the La Cornue Periwinkle Blue 110 Range and matching Hood.
https://www.truebearingbuilt.com/portfolio-items/fidalgo-island-remodel/
ARCHITECT: Island Architecture
CABINETS: Smith and Vallee Cabinet Makers
COUNTERTOPS: Creative Surfaces
PHOTOGRAPHY: Damian Vines
PROJECT DESCRIPTION
This is a fully re-visioned kitchen space that is hardly recognizable as compared to the old layout. Some bold moves make all the difference! The former location of the refrigerator was turned into a butler’s pantry, allowing the workflow to be rearranged for better functionality.
A new lighting plan with dimmable LED cans and undercabinet task lighting provides a warm ambiance, greatly improving functionality throughout the kitchen. Dramatic floating shelves add definition to the space, and the countertop and tile finishes complement the warmth of the wood finishes.
The project was made possible by a collaboration between Smith and Vallee Cabinet Makers and Island Architecture. Together, they tied the client’s love of art and design by adding pops of color and unique hardware to the project.

The wrap around corner floating shelves were quite the challenge to install, but with the help of the Artist, who is a wood worker, it was a collaborative vision that came to be.

The upper counter continues as a shelf that runs in back of the sink and into the lowered window sill to become a place of distinction for future art and plants to occupy.

The window was enlarged and the sill dropped. The clients have a huge art collection that they plan on displaying and I can’t wait to get some more shots with all their collection up and displayed! It will be a transformation of this Zen look, for sure. All the up-lighting above the cabinets is for art!!!! Can’t wait to see…..

Here is a photo of that amazing stove during construction- the photographer did not get a shot of this side of the kitchen for a good after shot, sorry! Love the color!!!!
This is the kitchen before. Dark Cherry cabinets with the stove in the back and heavy upper cabinets- we punched out a wall and added a window back where the old pantry was and expanded the kitchen back to gain counter space.
Kitchen Before
Kitchen Before- see how the window sill was high and cut off view to the garden?

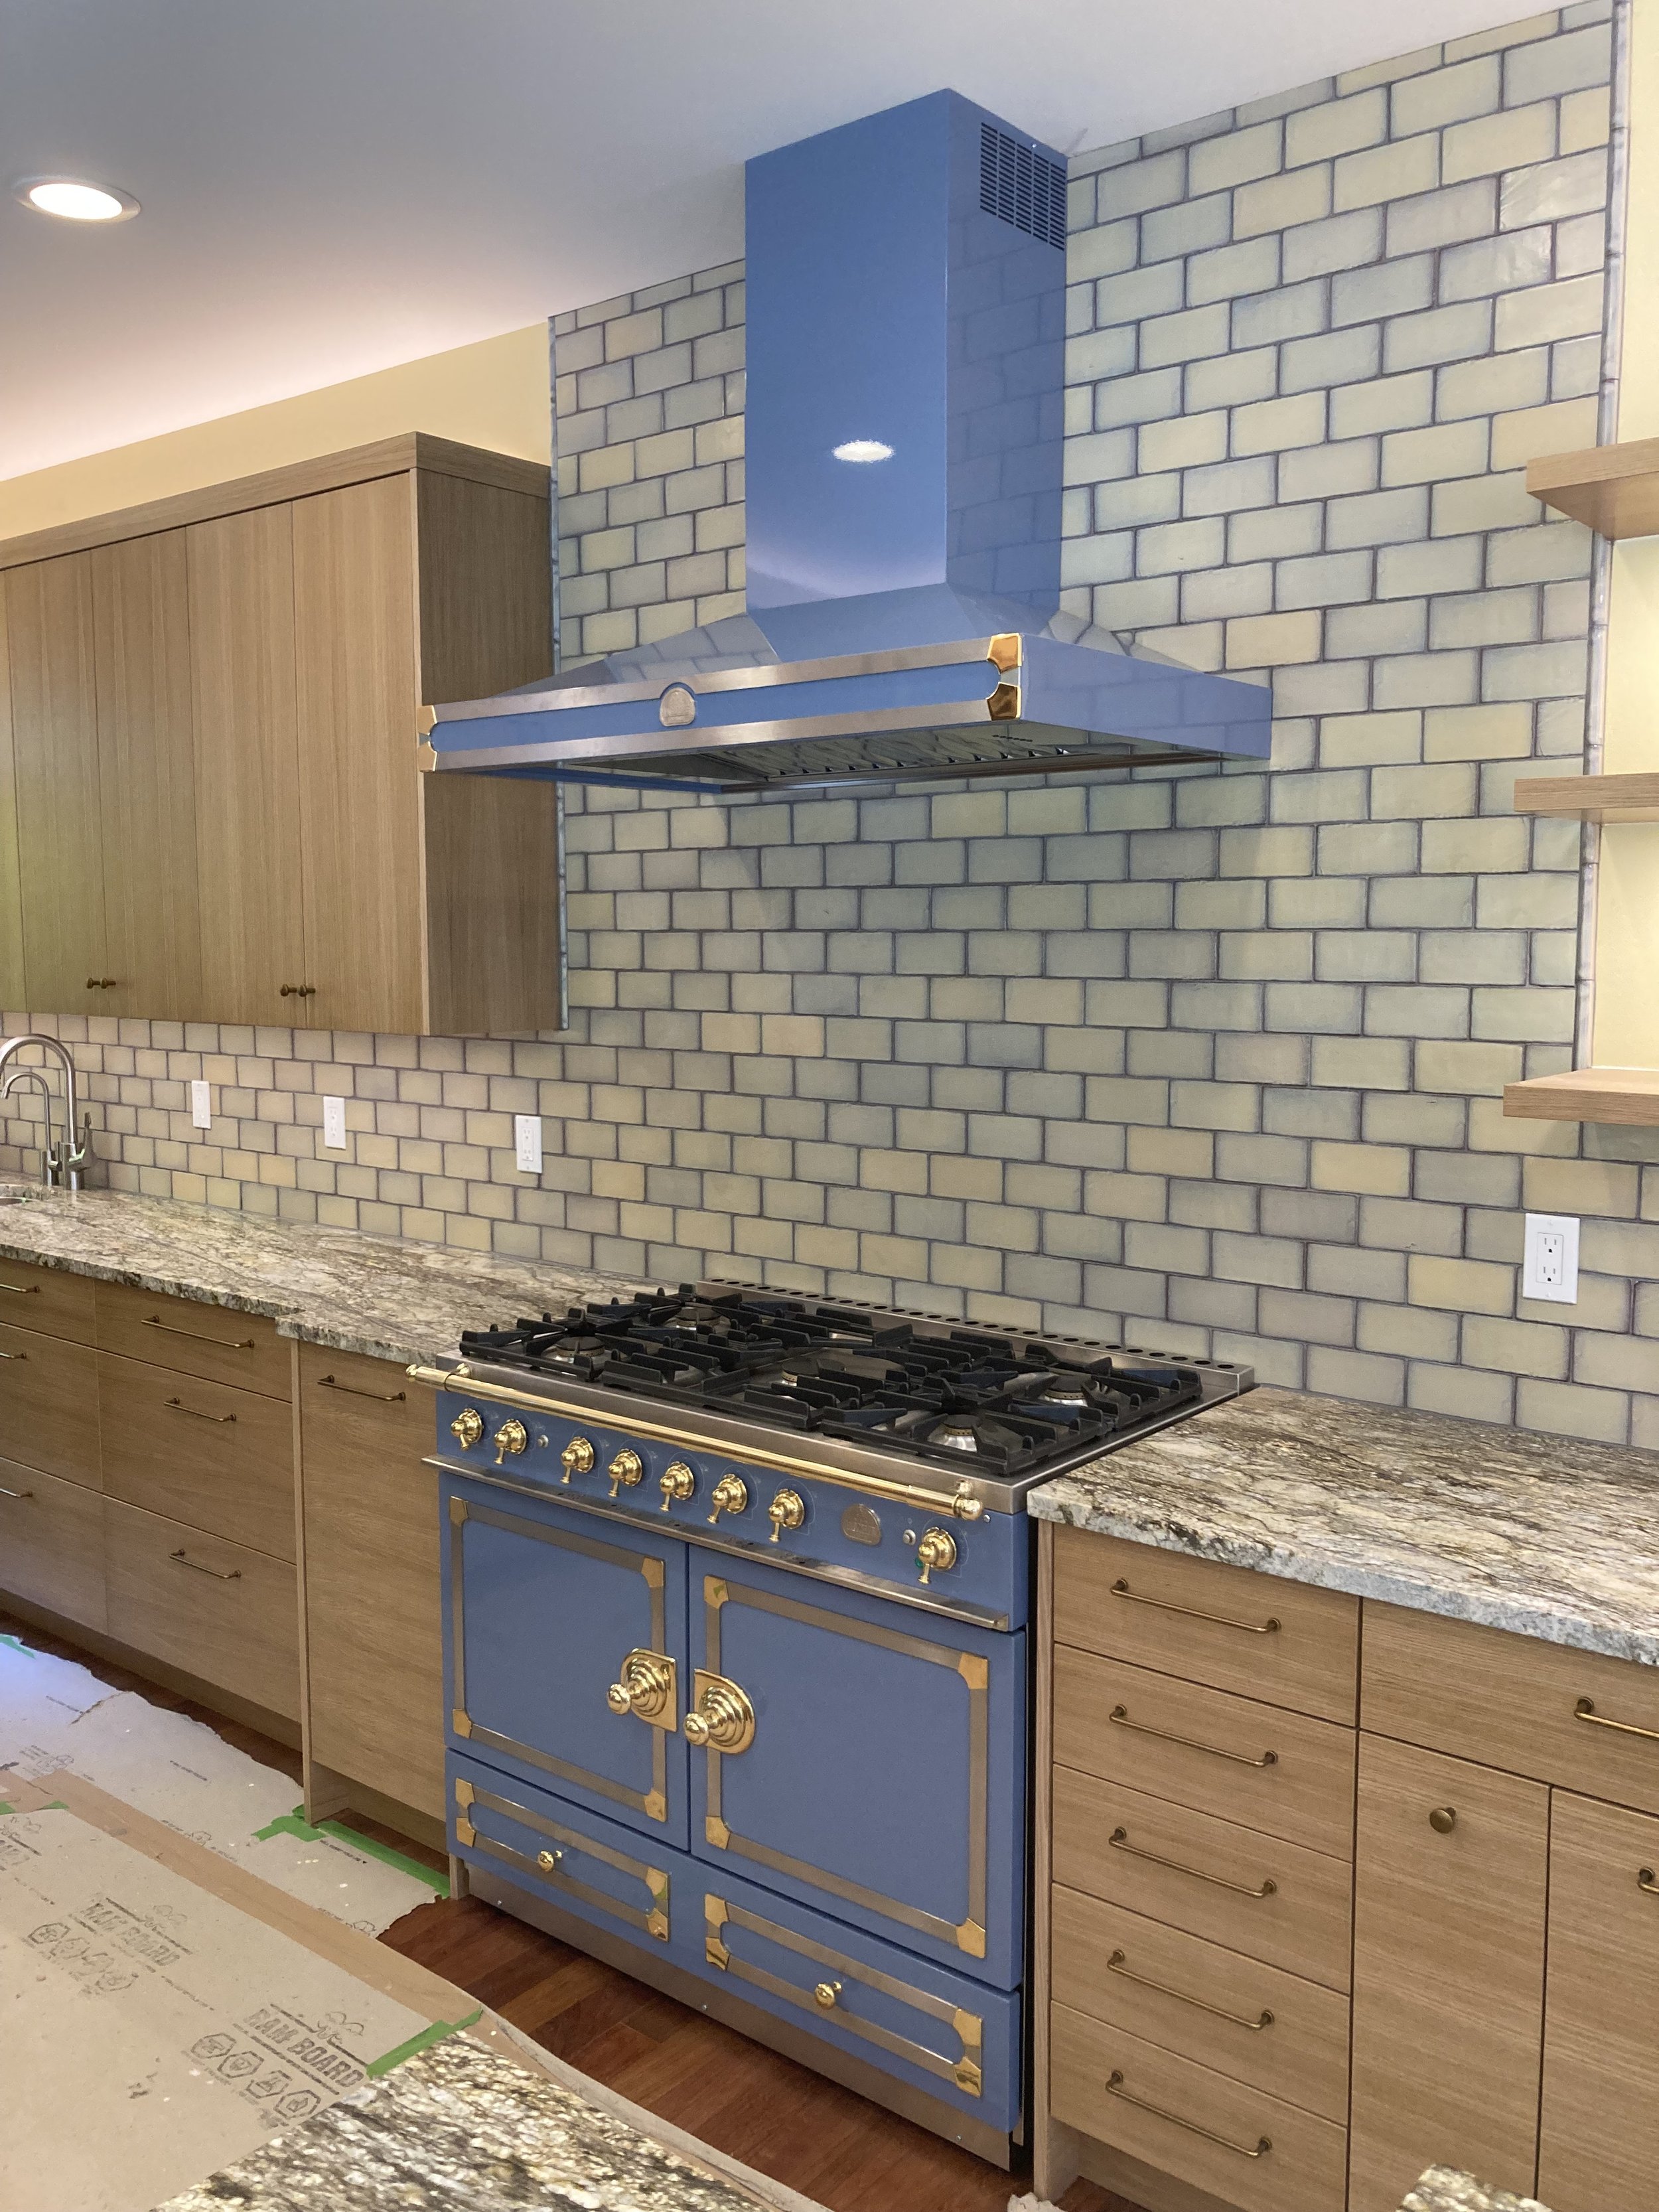
Here is the shot I was looking for of the finished stove side!!!!!! Art is starting to bubble in….
Orcas Island continued-walls removed/re-oriented!

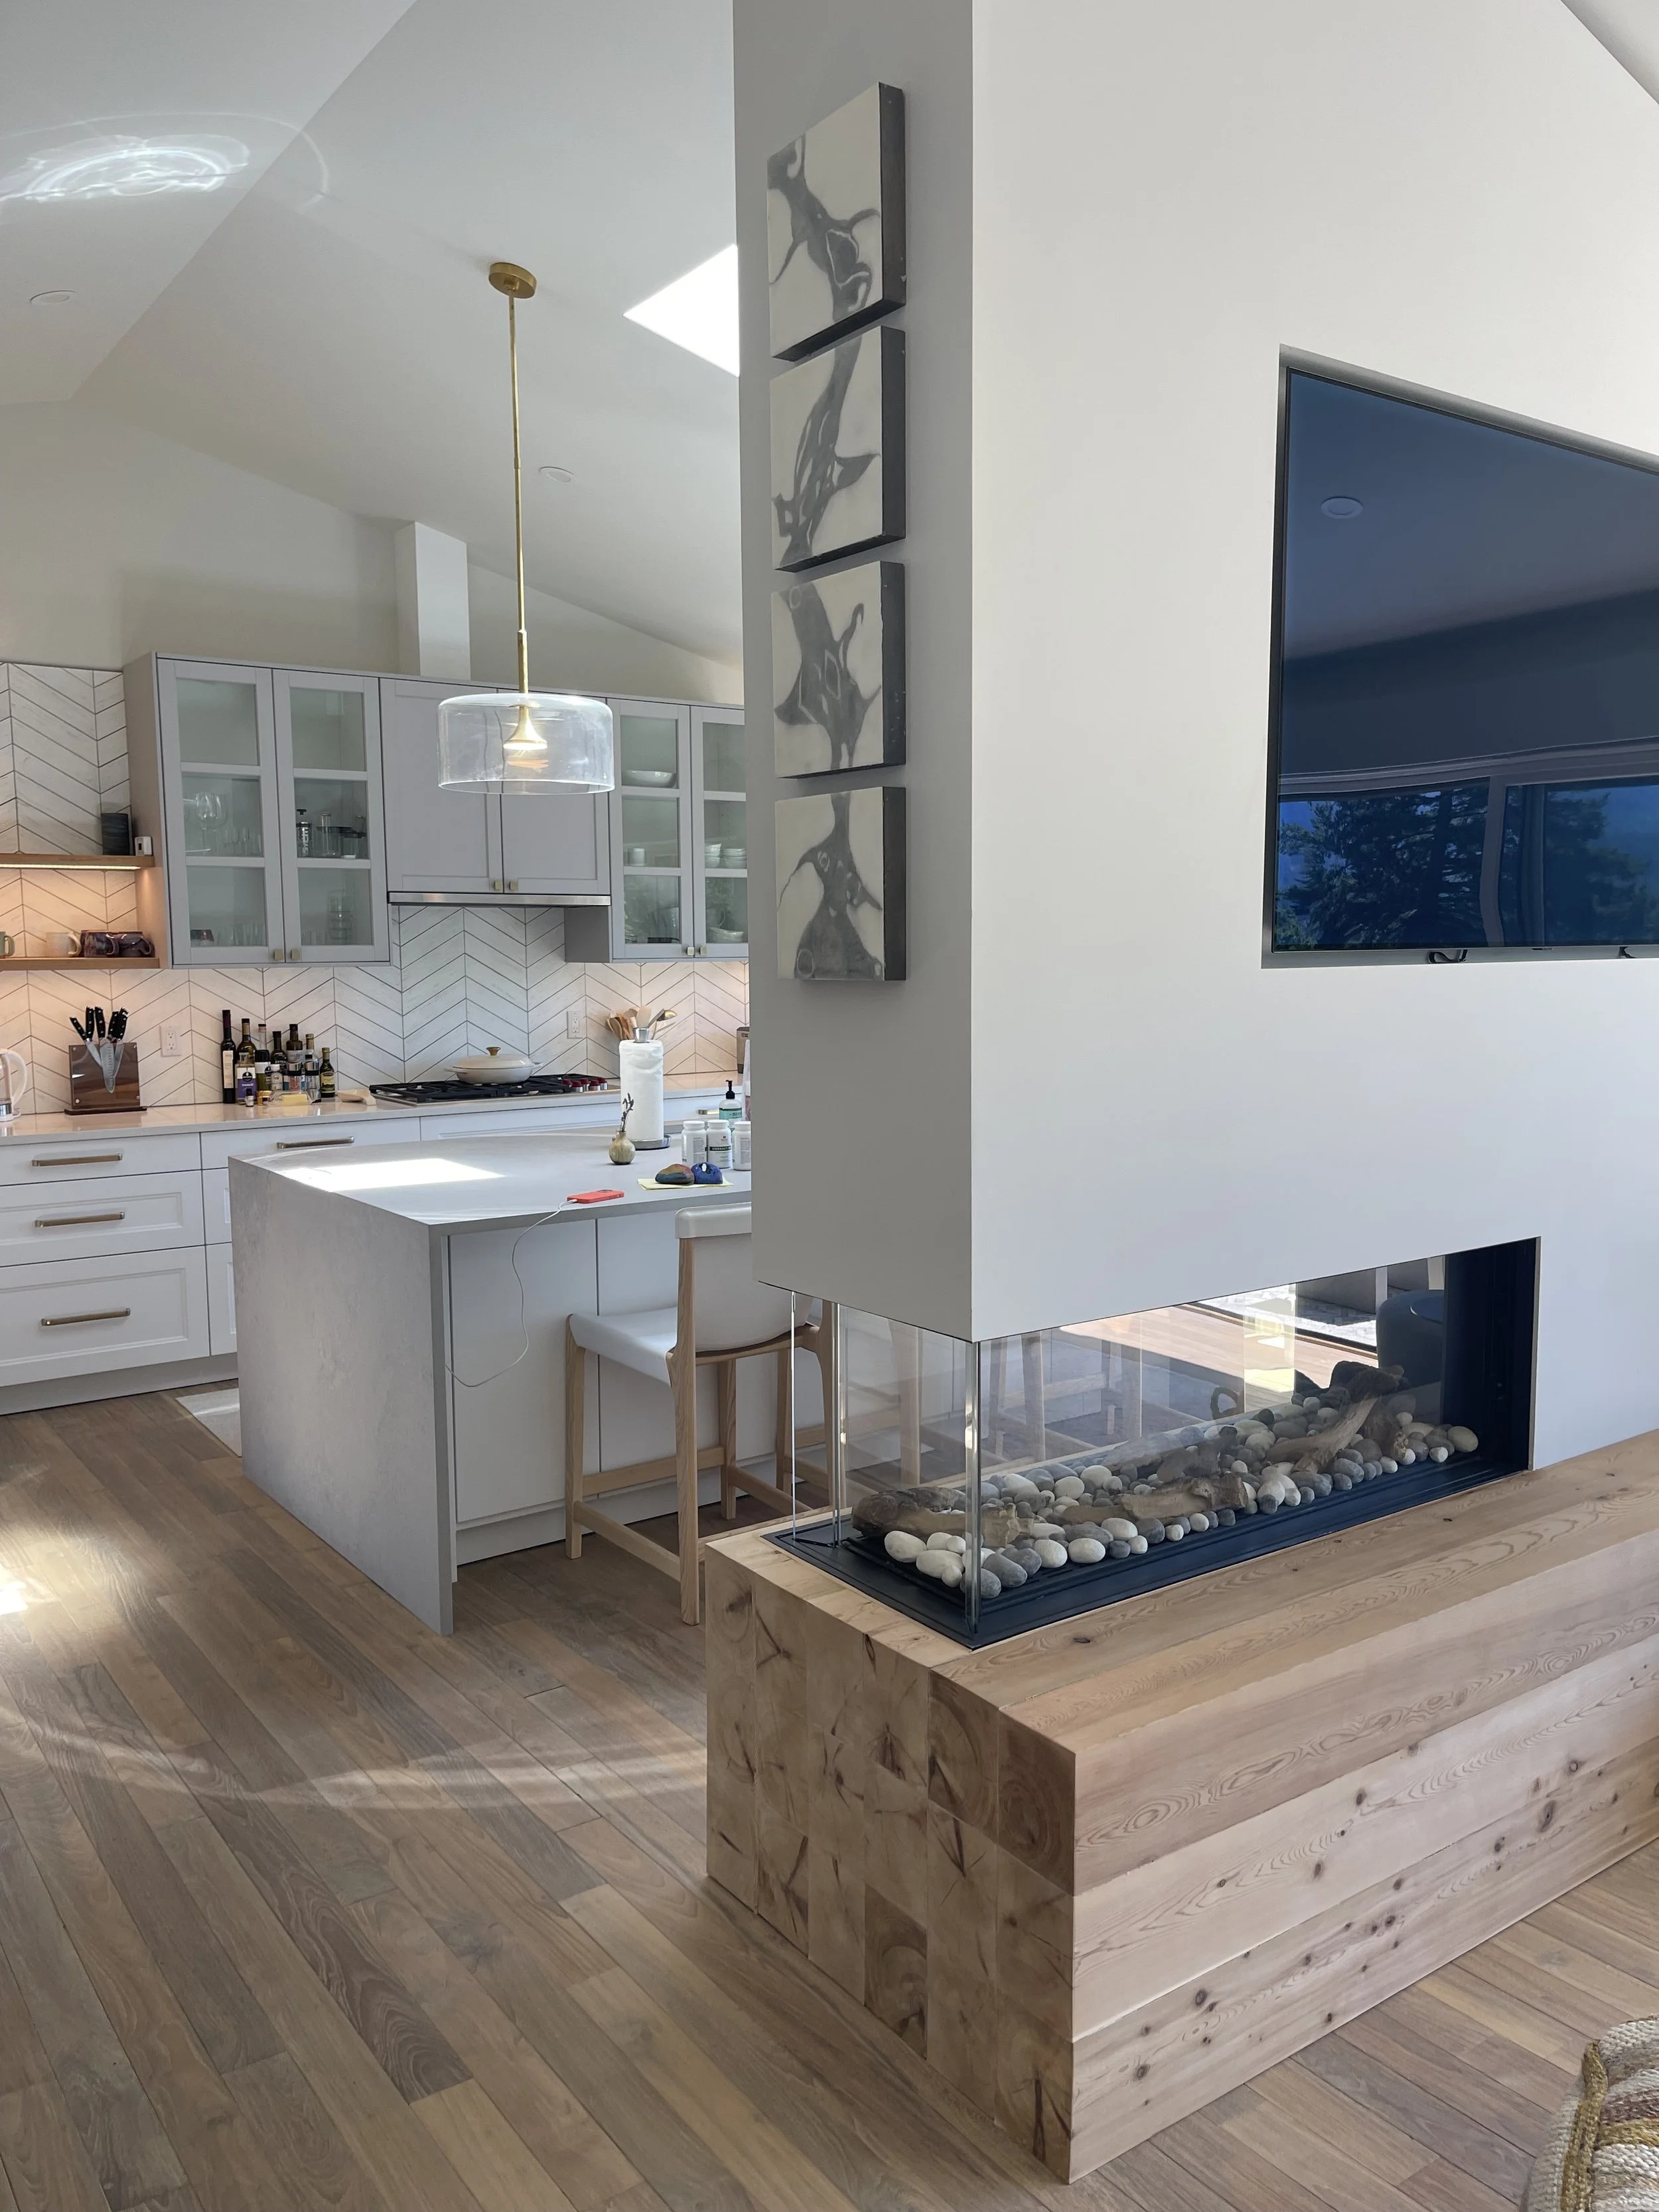
This is a continuation of the last project that has the new entry and staircase. The interior was gutted to the studs and interior walls were taken down to open up the space. A new 16’ wide sliding glass door was installed to replace a door and windows to open up the view to Rosario. A 3-sided gas fireplace was installed to connect the living area to the kitchen.

This is the other side looking into the kitchen. The new island has “Waterfall” sides.
Lookin into the lithe from the living room.

The other side of the living room with new staircase visible on the left, that connects the 2 levels.

Love the new banquet!


This is the “BEFORE” photo of that space.

This was the kitchen before! It was shoved in the back of the unit away from the view. We flipped the kitchen to the view side.

This is the kitchen moved, after… much better eh? Wood tiles on the backsplash are the same manufacturer that I quoted before. The flooring and tile are from IndoTeak Design, a great little company in San Diego.
Their tile line is called Cinta.
Matt is the manager and Kim runs the showroom.

The cabinet bases are from IKEA and the fronts are from SEMI HAND MADE does really nice driftwood fronts for Ikea cabinets. https://www.semihandmade.com/
I also like the interior lights that light up the back of each drawer, so that you can see what is in there.

The pantry has loads of storage.
KITCHEN before in photos and 3D renderings on Lopez Island, WA

The layout of the house is something that the client’s parents built in the 90’s- actually 1996 to be exact. It is right on a low bluff that is 50’ from “Top of Bank”, so nothing can be added. We are trying to work within the existing shell as much as possible, but we are punching out in one corner “Under an existing deck”, so that we are not expanding the existing envelope. The Octagon currently holds the entire kitchen, with all the wasted space from the 45 degree corners that make cabinetry a bit tricky. I suggested using that space for the dining area instead of the current location and building in a window bench where people will want to be sitting there looking out over the water in 2 directions…

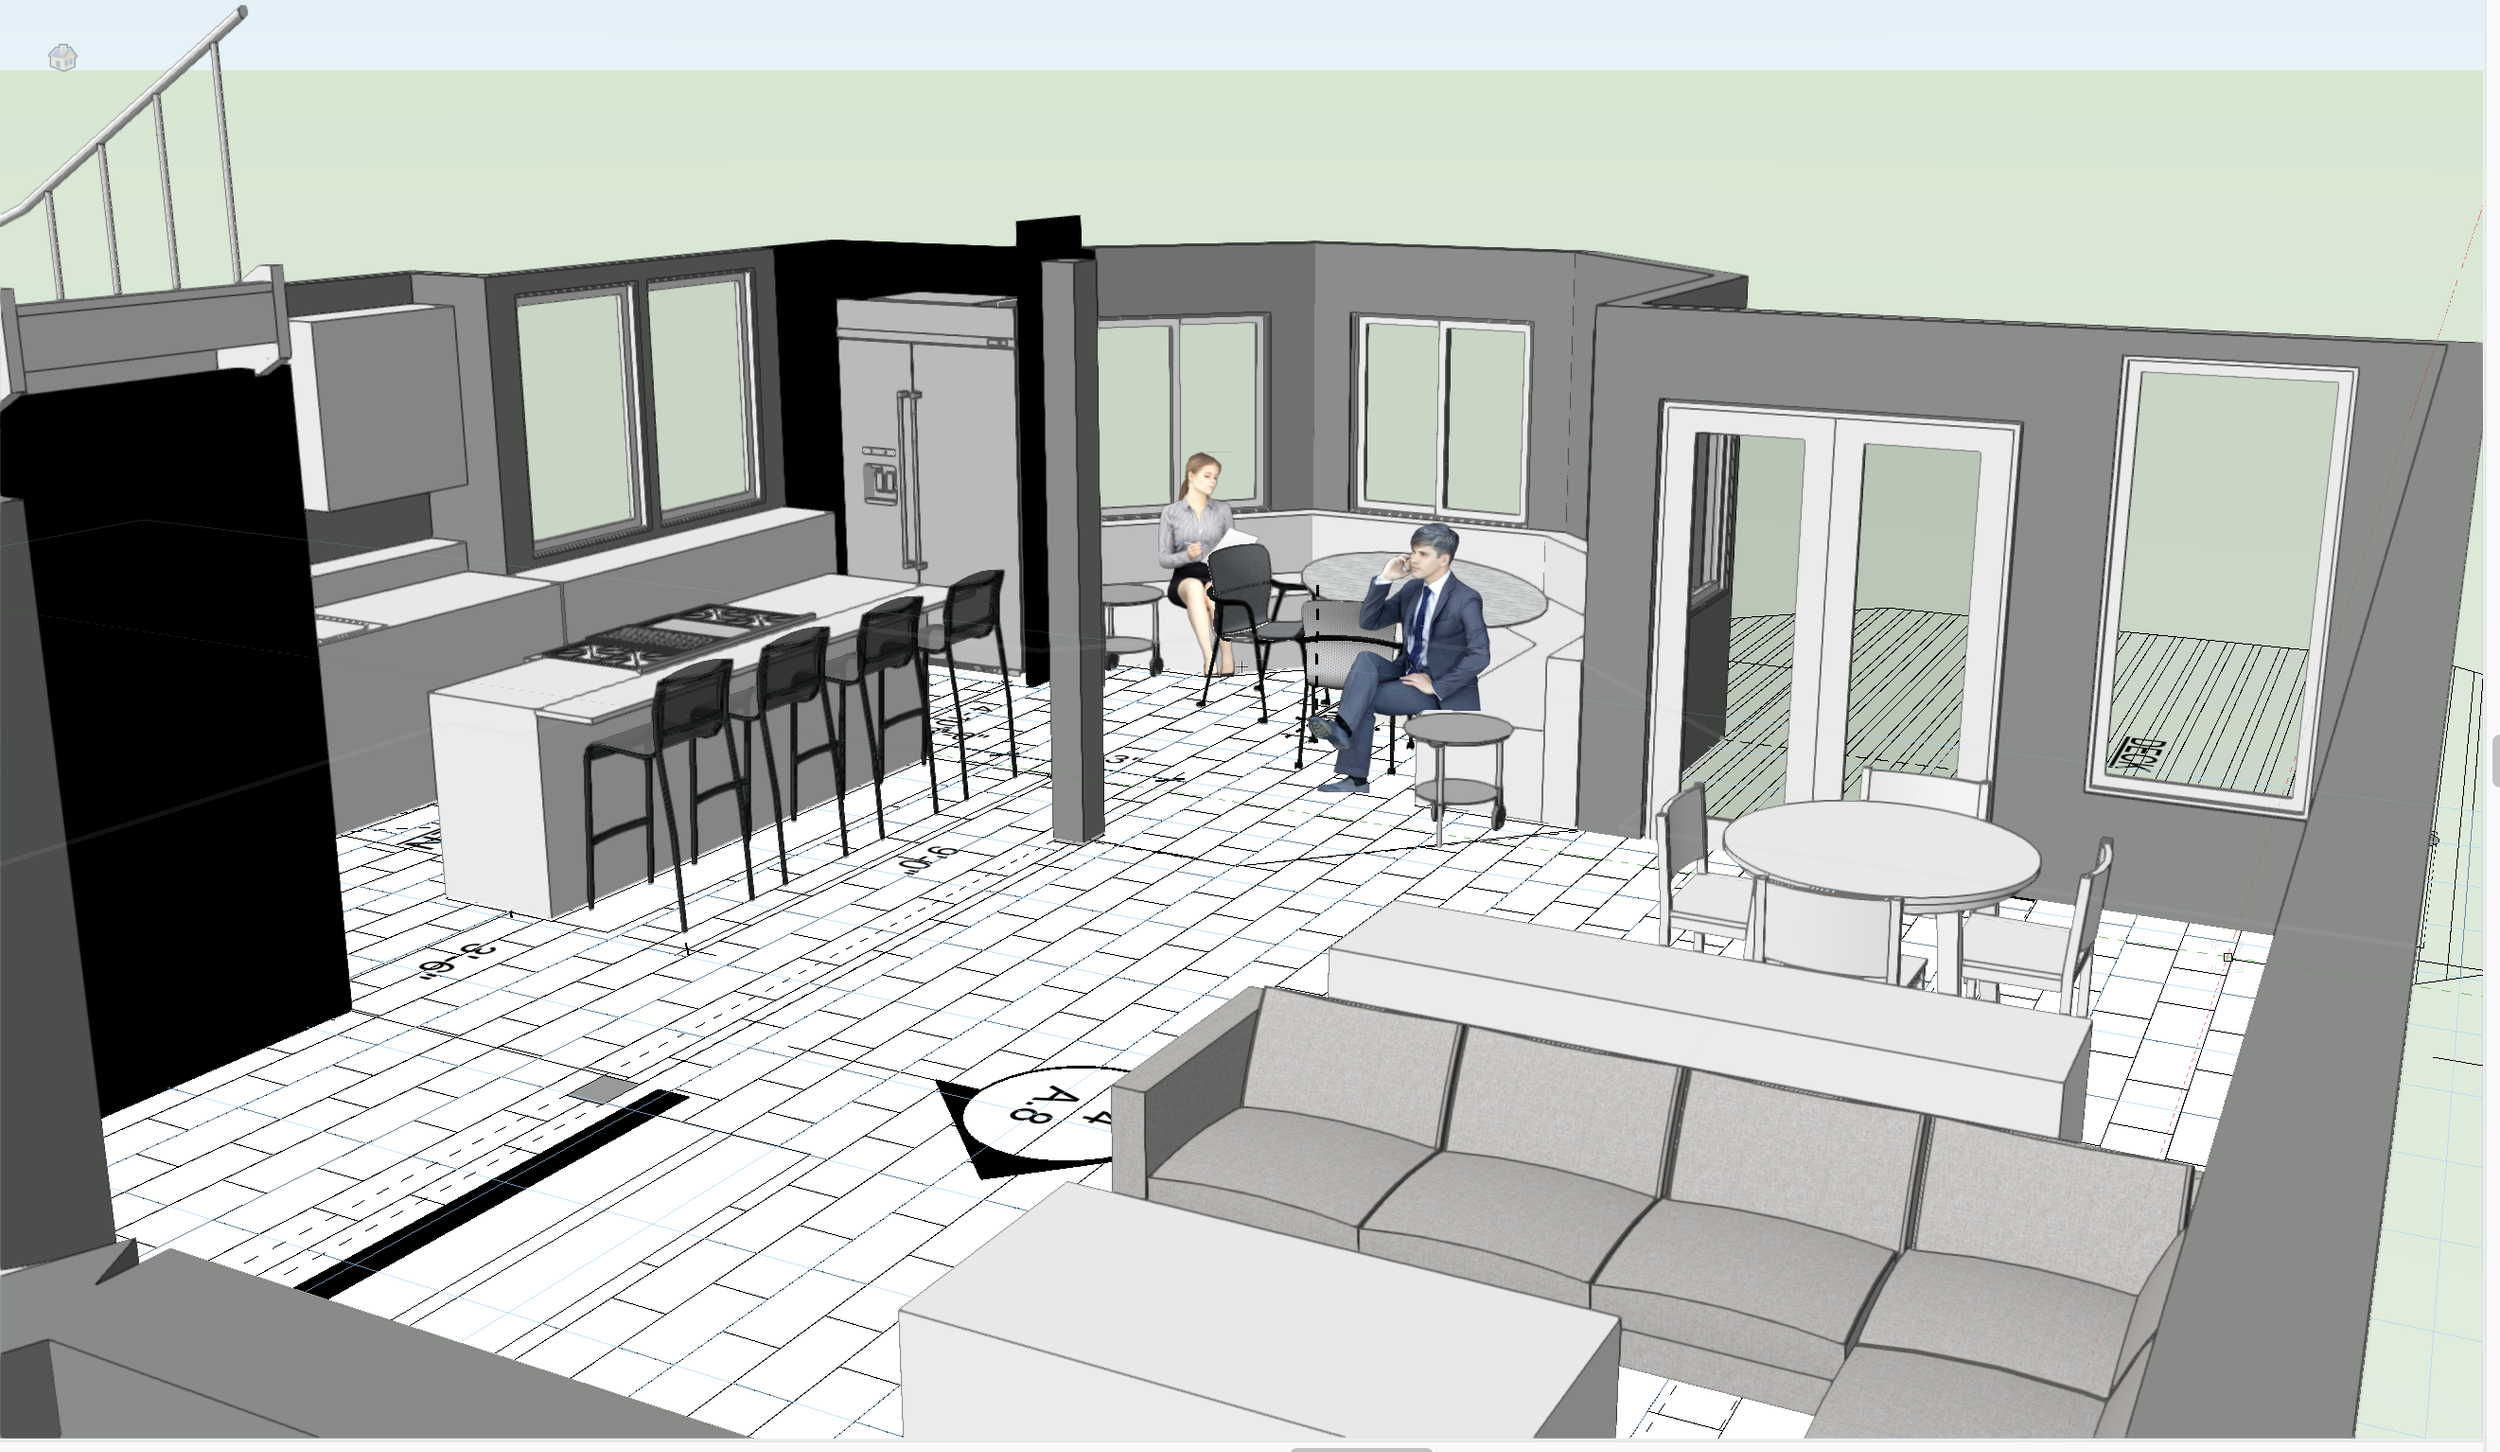

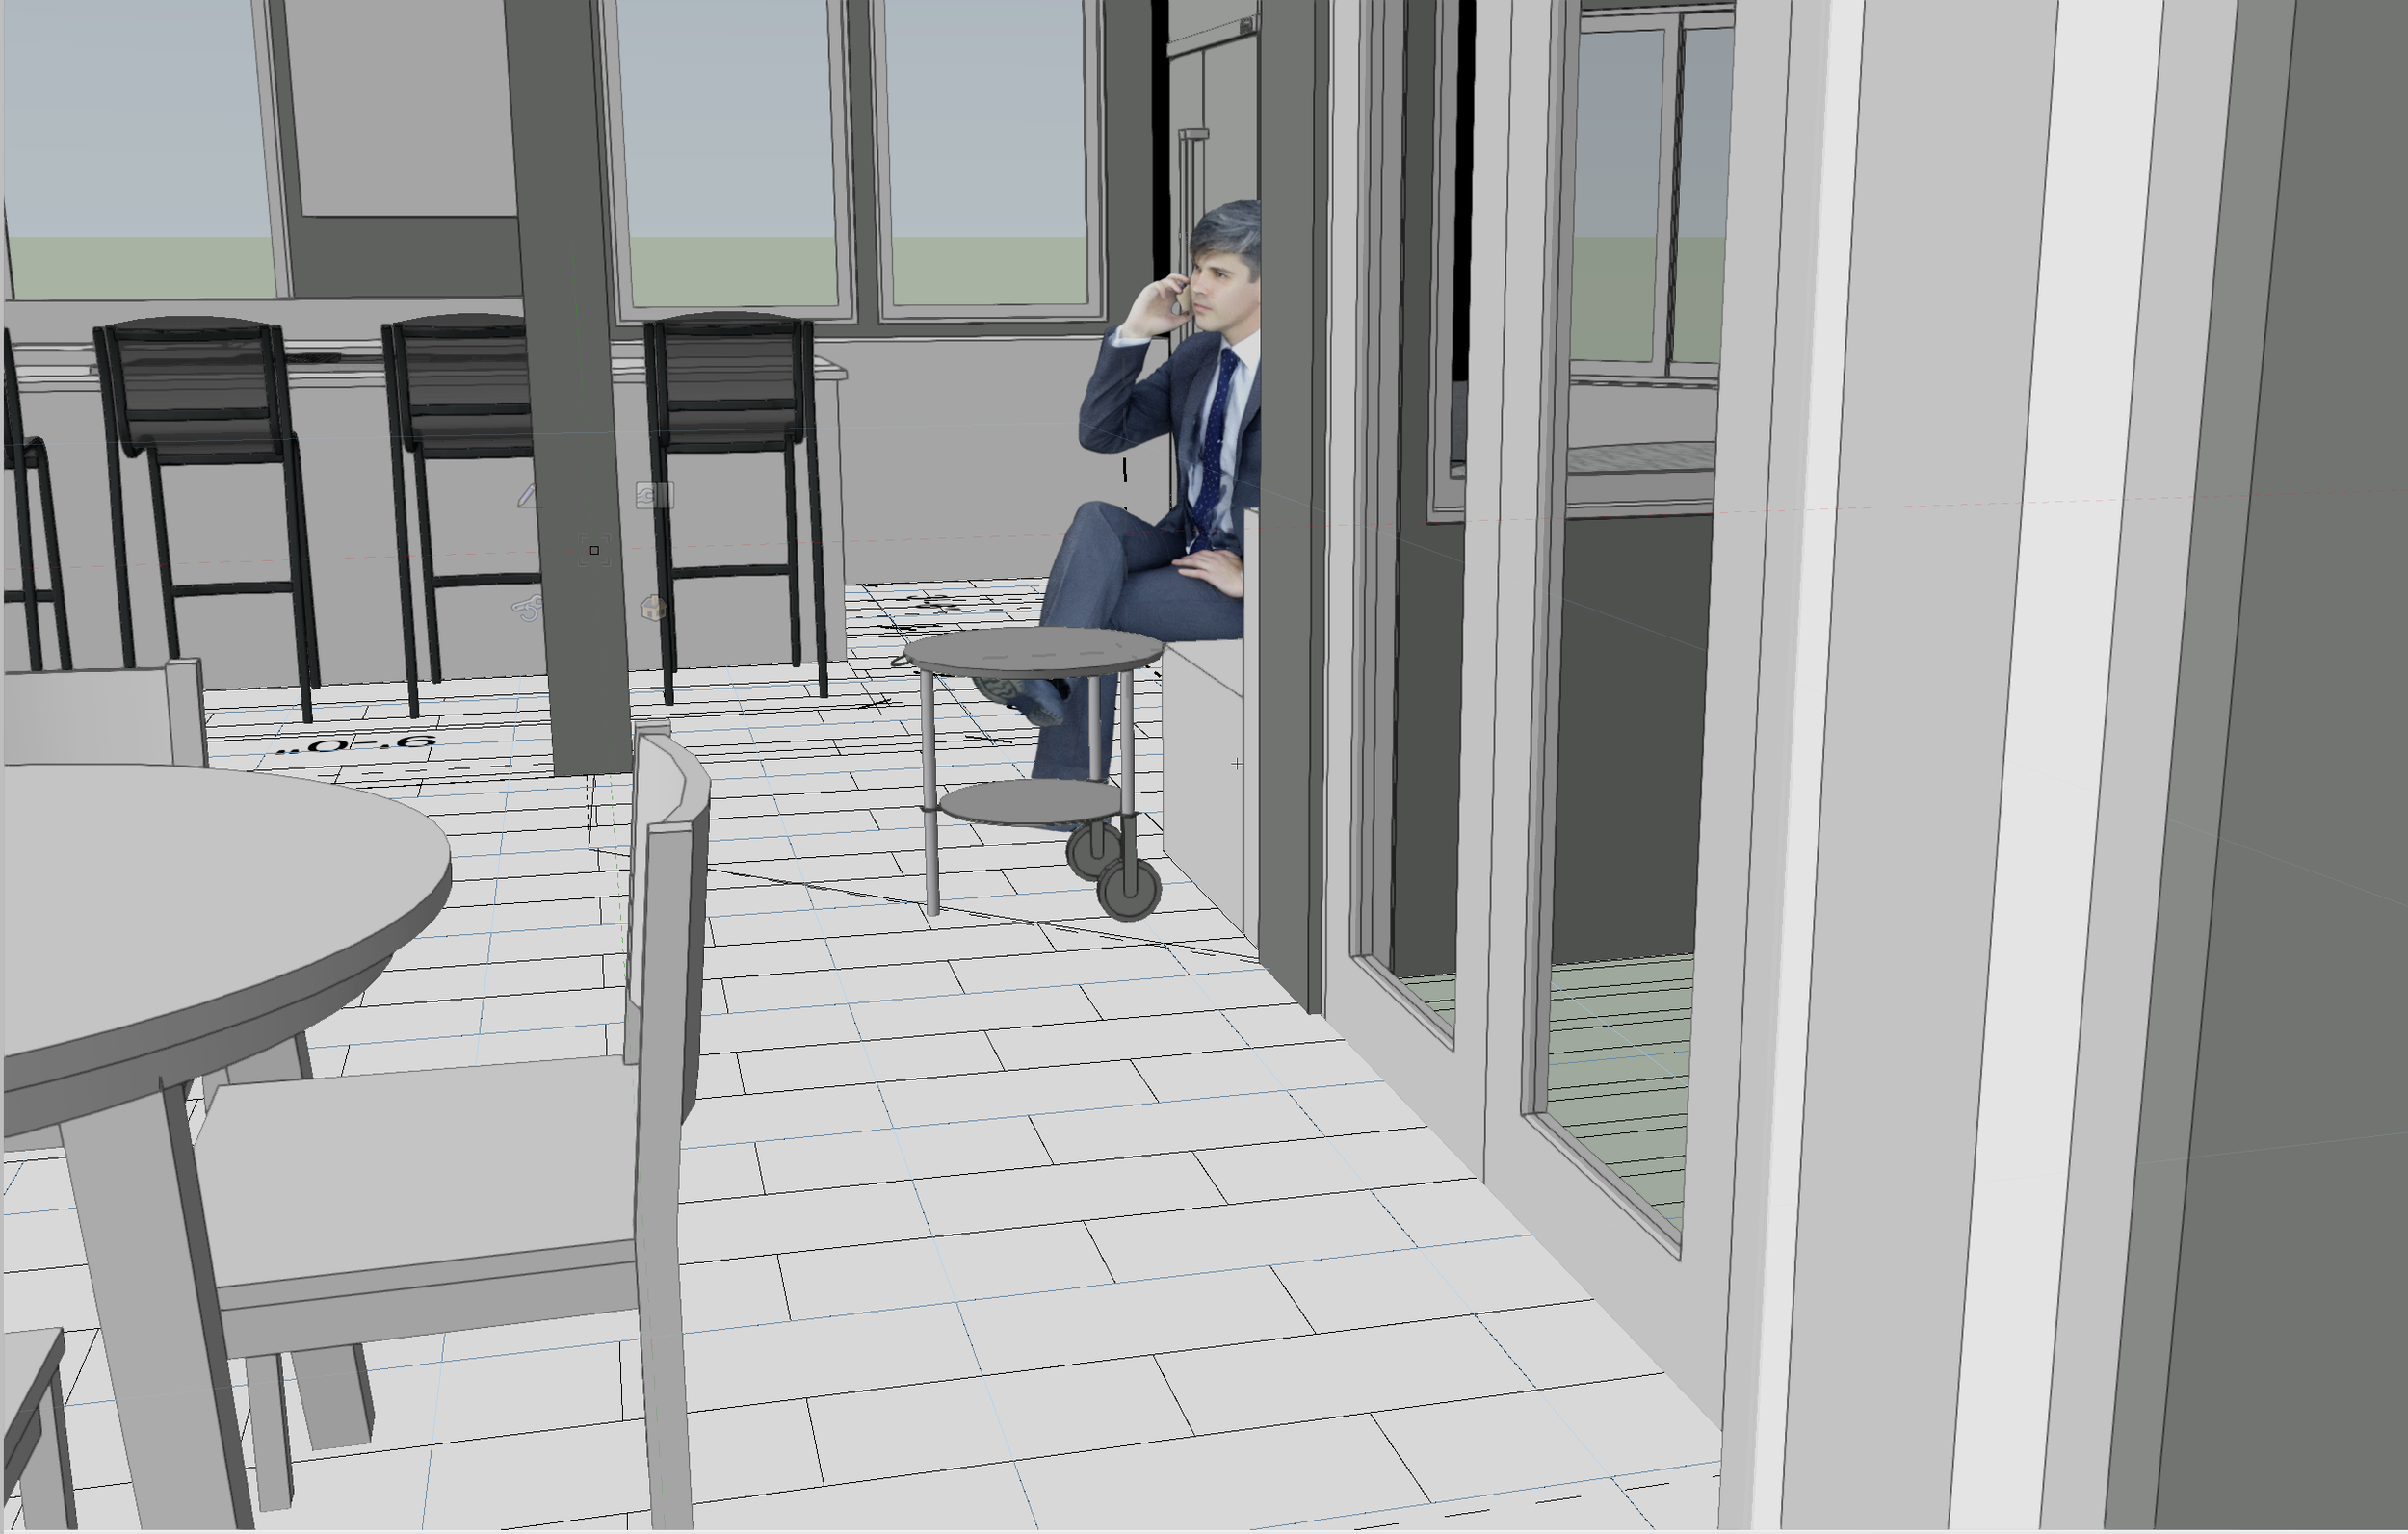


This would be the view when you are coming in from the entry, looking into the dining area, with the kitchen to your left. We are Option#15, and getting really close! What do you think?

This is the site on Lopez- so surrounded by water on both sides! Just Gorgeous, or what? So grateful that I get to work on such sacred land- the Coast Salish Peoples revere this area today, as their ancestors fished here for millennia and there were probably Oyster and clam farms in this bay.
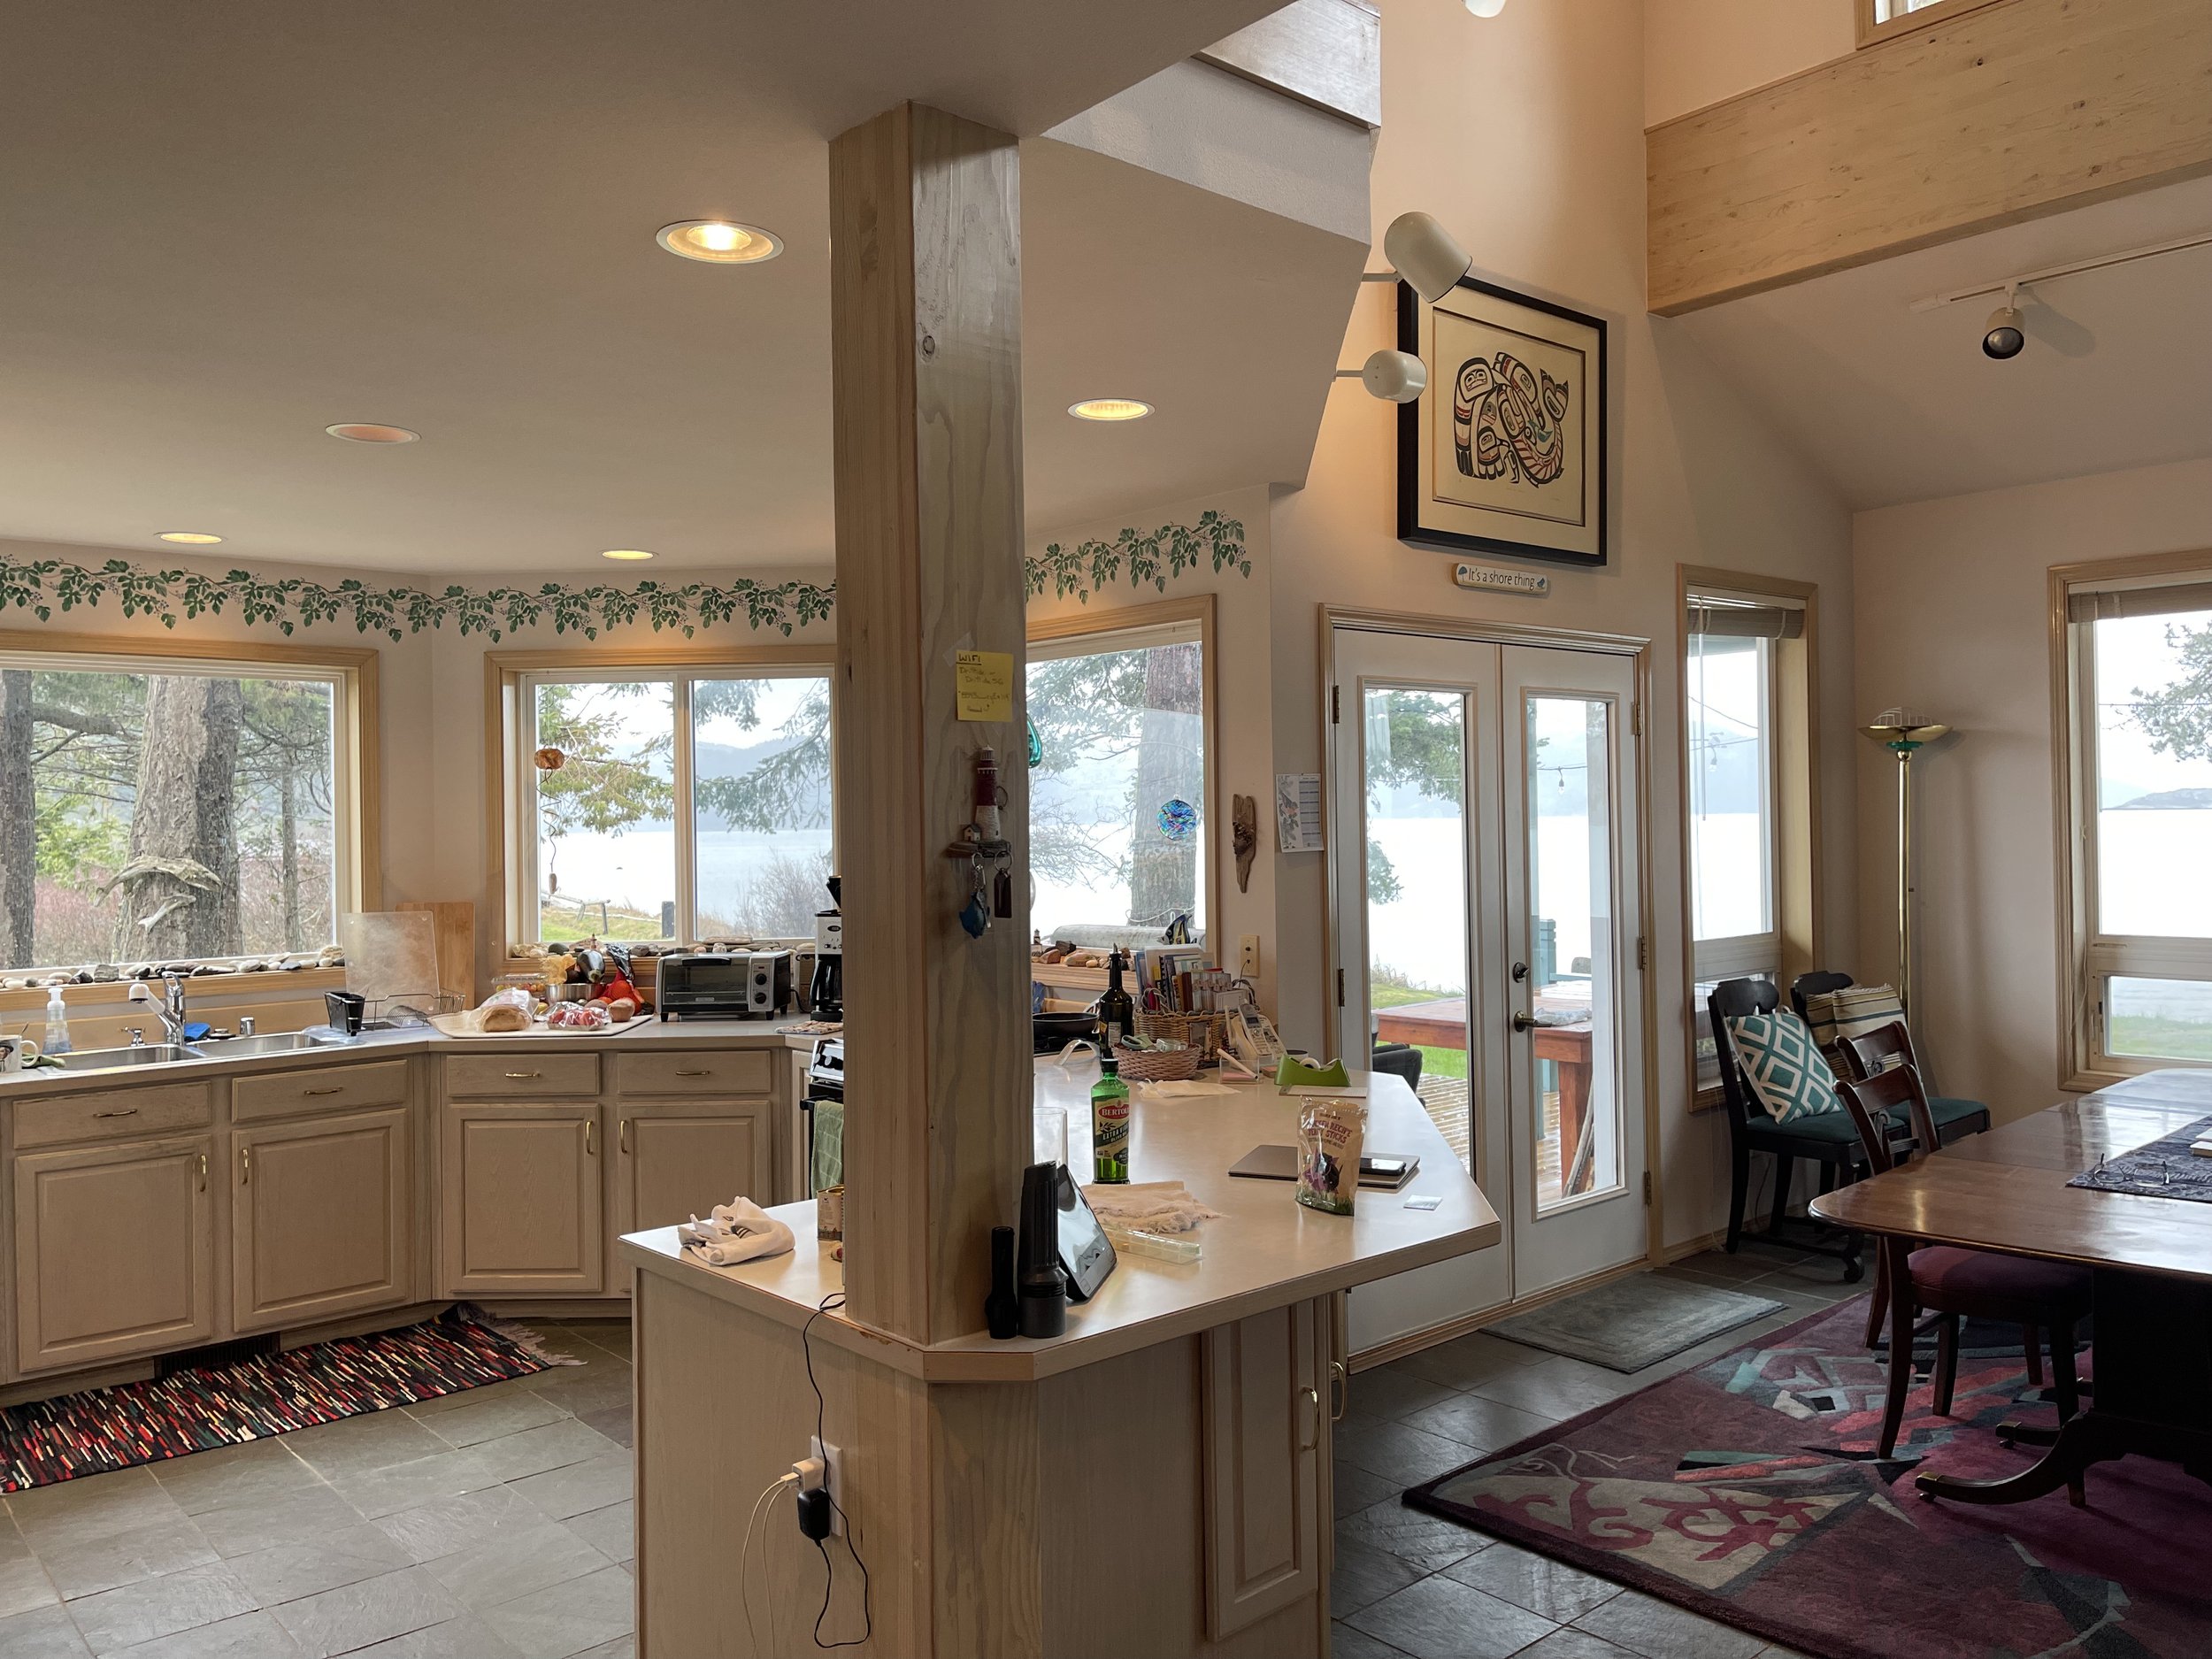
This is the kitchen now,
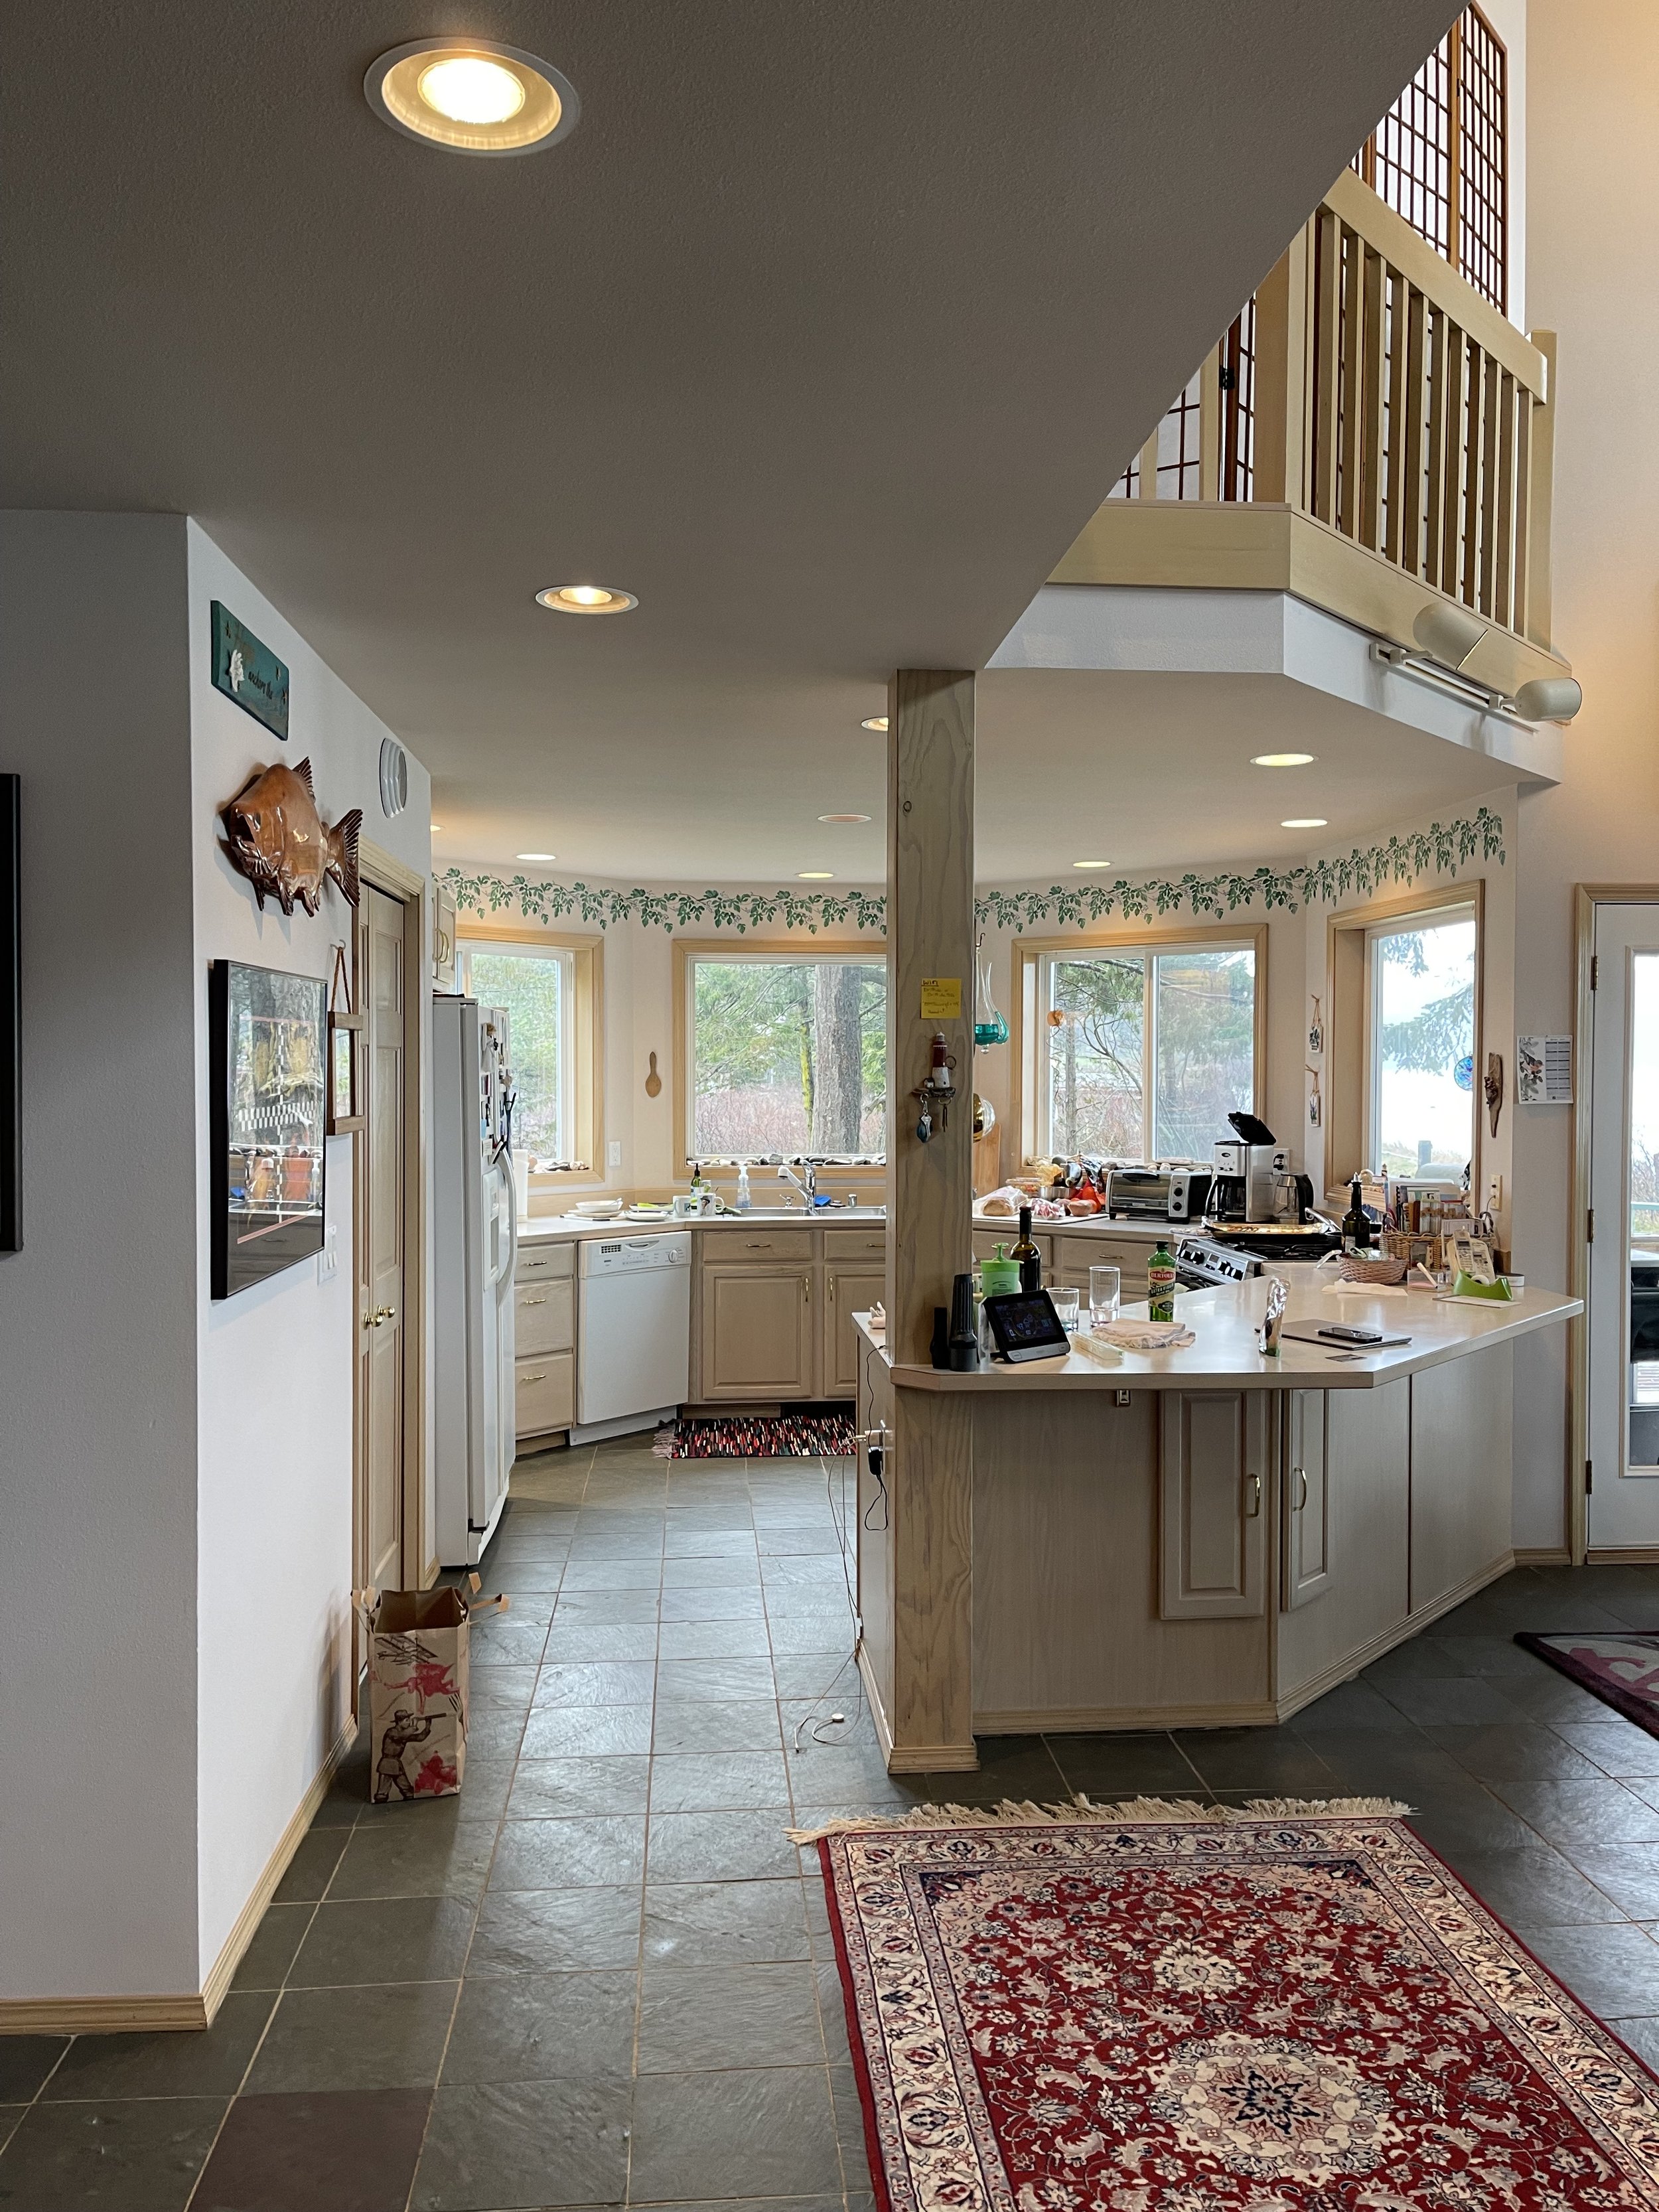
Existing kitchen from the entry view. The window seat is going to transform this space and the new kitchen location still has fabulous views. The interior is very “Dated’ now and the son of the original owners wants to have his own signature on the house so that it feels like it is for the new generation with kids and grandchildren all there.
Roof Modeling- Gabled Dormer of Cupola?

This is a house in the Skyline neighborhood of Anacortes that has a simple gabled roof with no articulation. The owners want to give it some character and I am trying out various options in my 3D model of the house.

Another view from the side of the single gabled dormer.

Here is the Cupola Idea.

Here it is from the front- which one would you vote is best?
BLUE STOVE ALERT- It's all about the cooking altar!
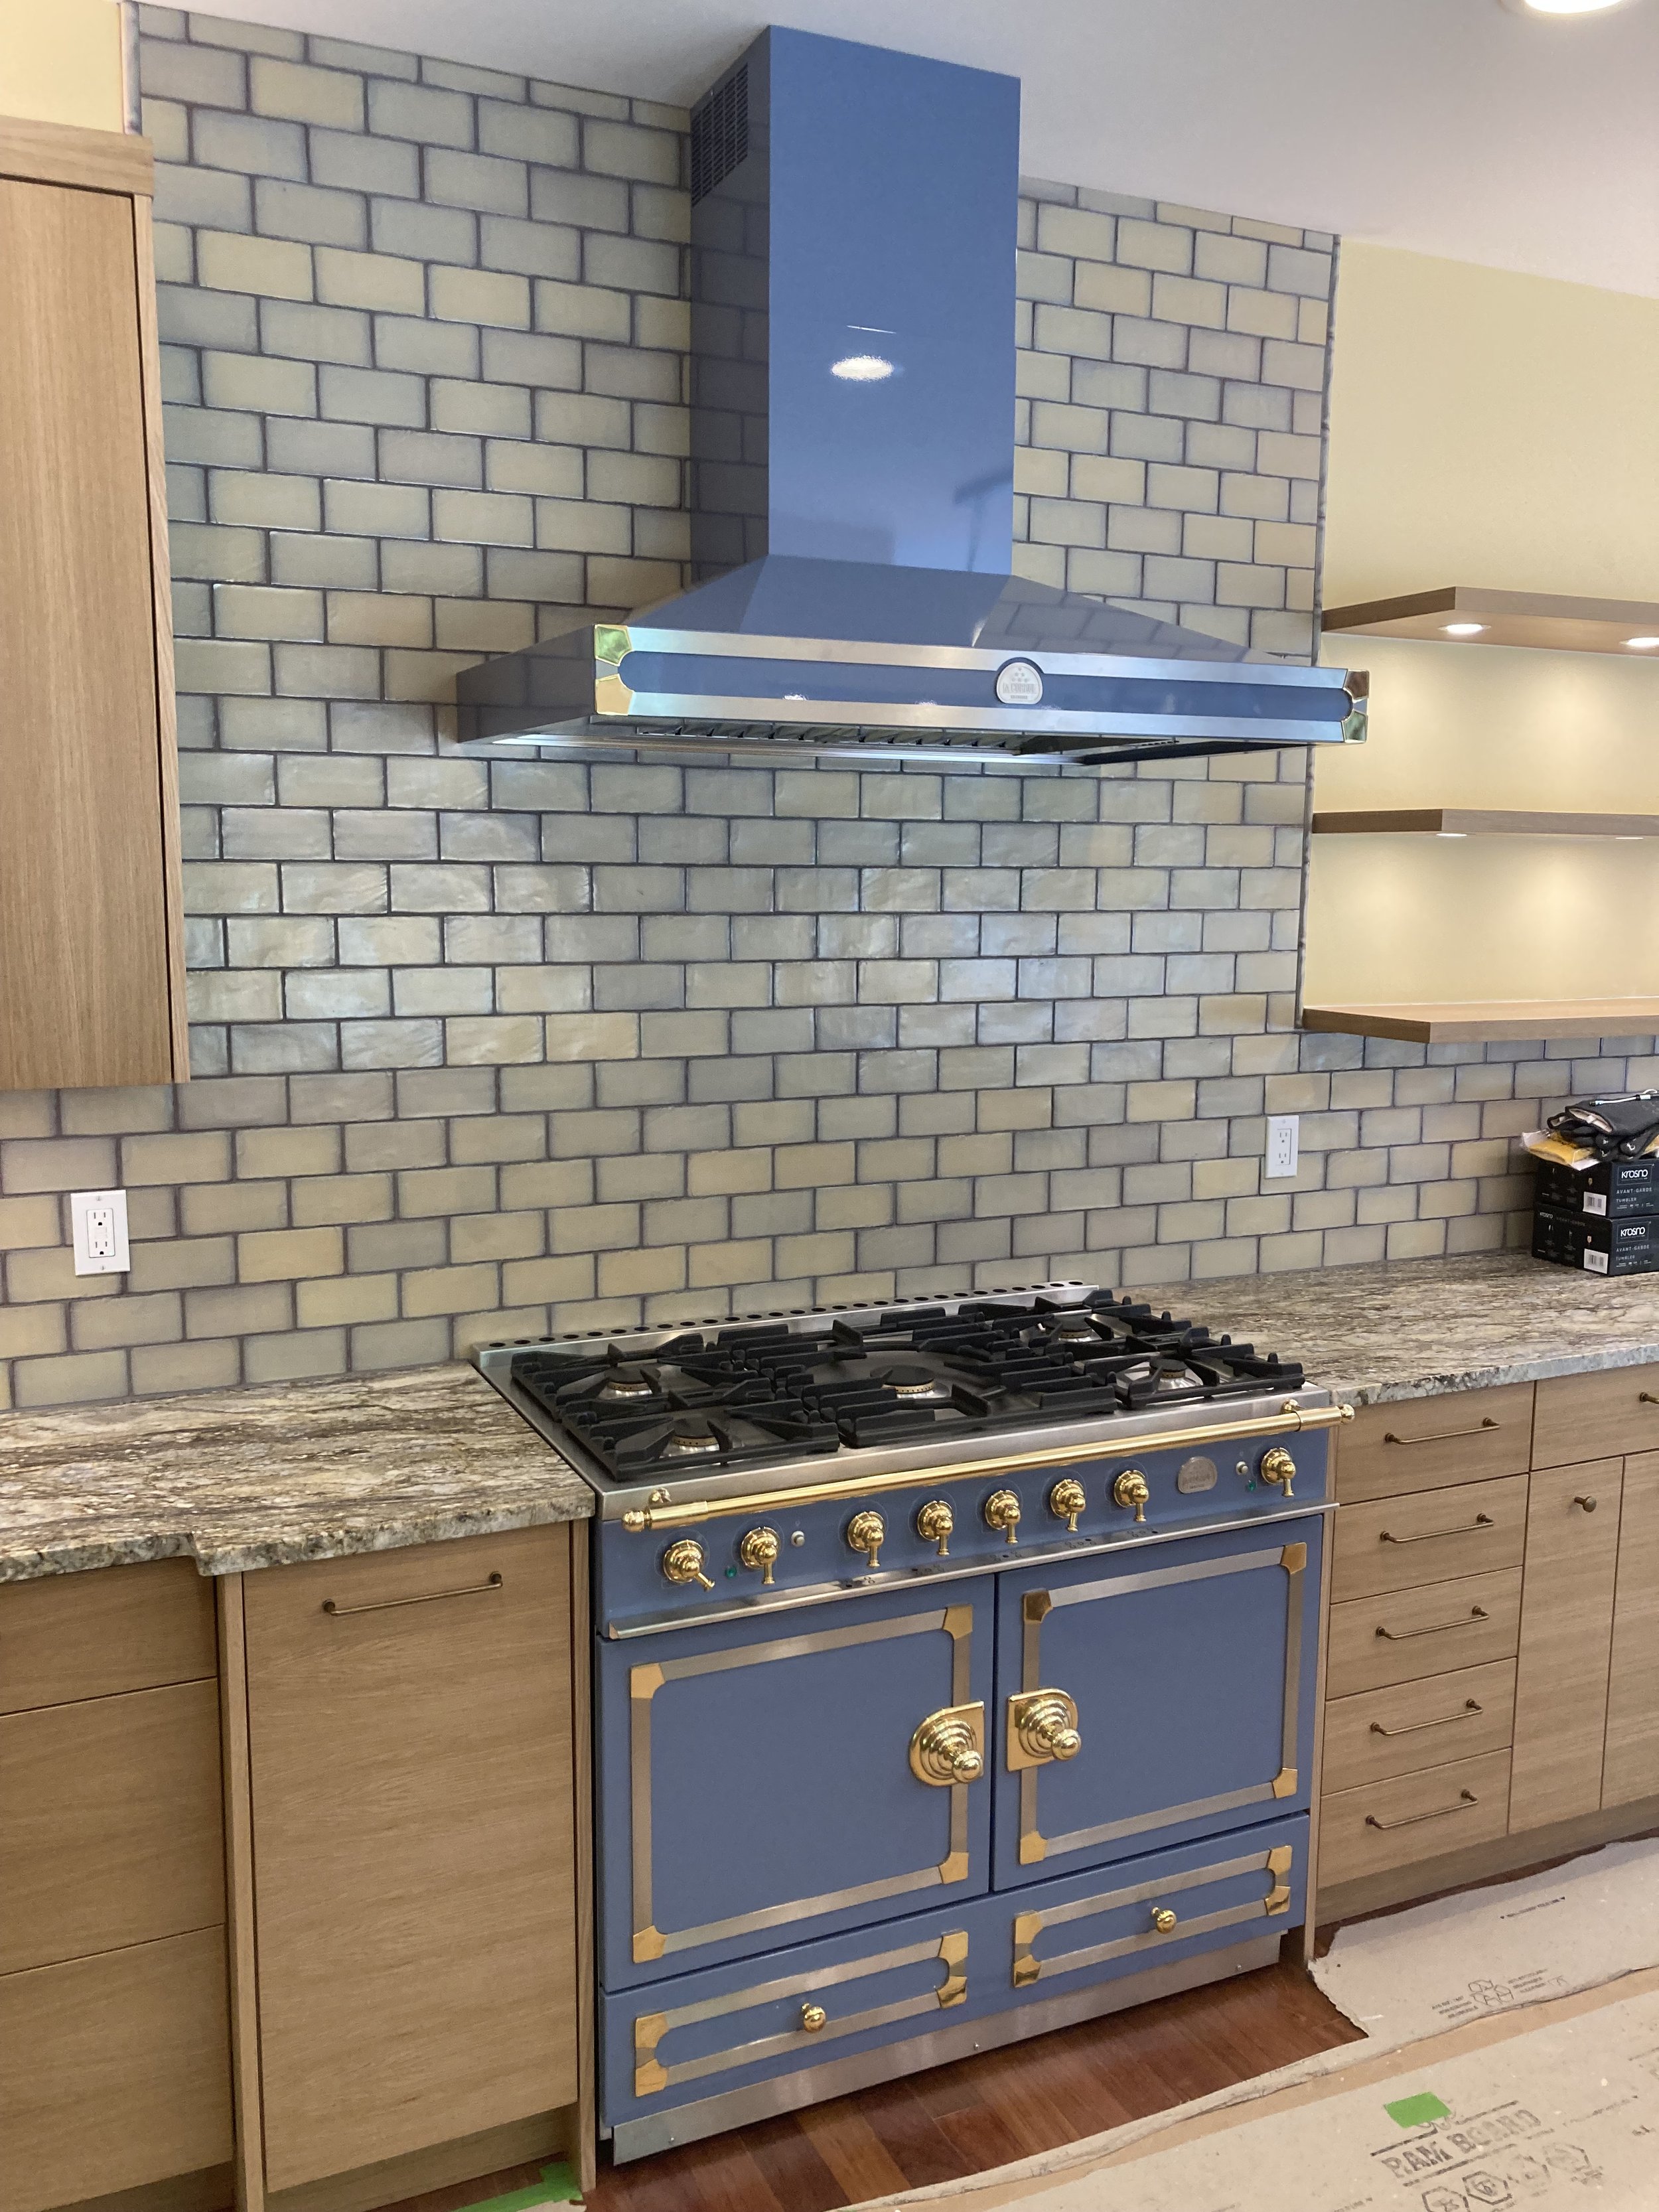
The original CornuFé range, this 43" range is the center of a new kitchen that I designed for 2 artists in Anacortes. The “Periwinkle Blue” really pops out against the Rift Cut Oak cabinets- the floor is still masked off- more photos of when it is complete to follow!!!
The original CornuFé range, this 43" range is your first La Cornue love. It’s available in sixteen colors and
3 trim accent choices of Polished Brass, Satin Chrome and Polished Chrome. The CornuFé 110 features two
electric convection ovens, one of which is a seven mode multifunction oven, the other an electric convection
oven, five powerful gas burners and one large storage drawer.

Can’t wait to see it all done!
New stairway idea for Victorian in Cap Sante

My client called me a “Genius” on this one! Always nice to get that kind of compliment!
This is the same house that I did the last blog post for the interior remodel and now the owner wants to tackle the tiny staircase that has 9” treads (the part that you put your foot on- so 11” treads are standard today). The only way to get the stairway to work is to punch out the side of the structure towards the driveway (this is my 13th option on how to solve this, so went through a lot of ideas to get to this point). This still allows to park cars, and does not touch the ground- cantilvered off the side. So then I don’t have to do a “Stormwater Plan” yipee!

The stair punch out from the side

Here is a 3D model shot of the interior- there is a closet above that we donlt want to touch, so that is the main restriction.

Another view of the model to see how it is working.
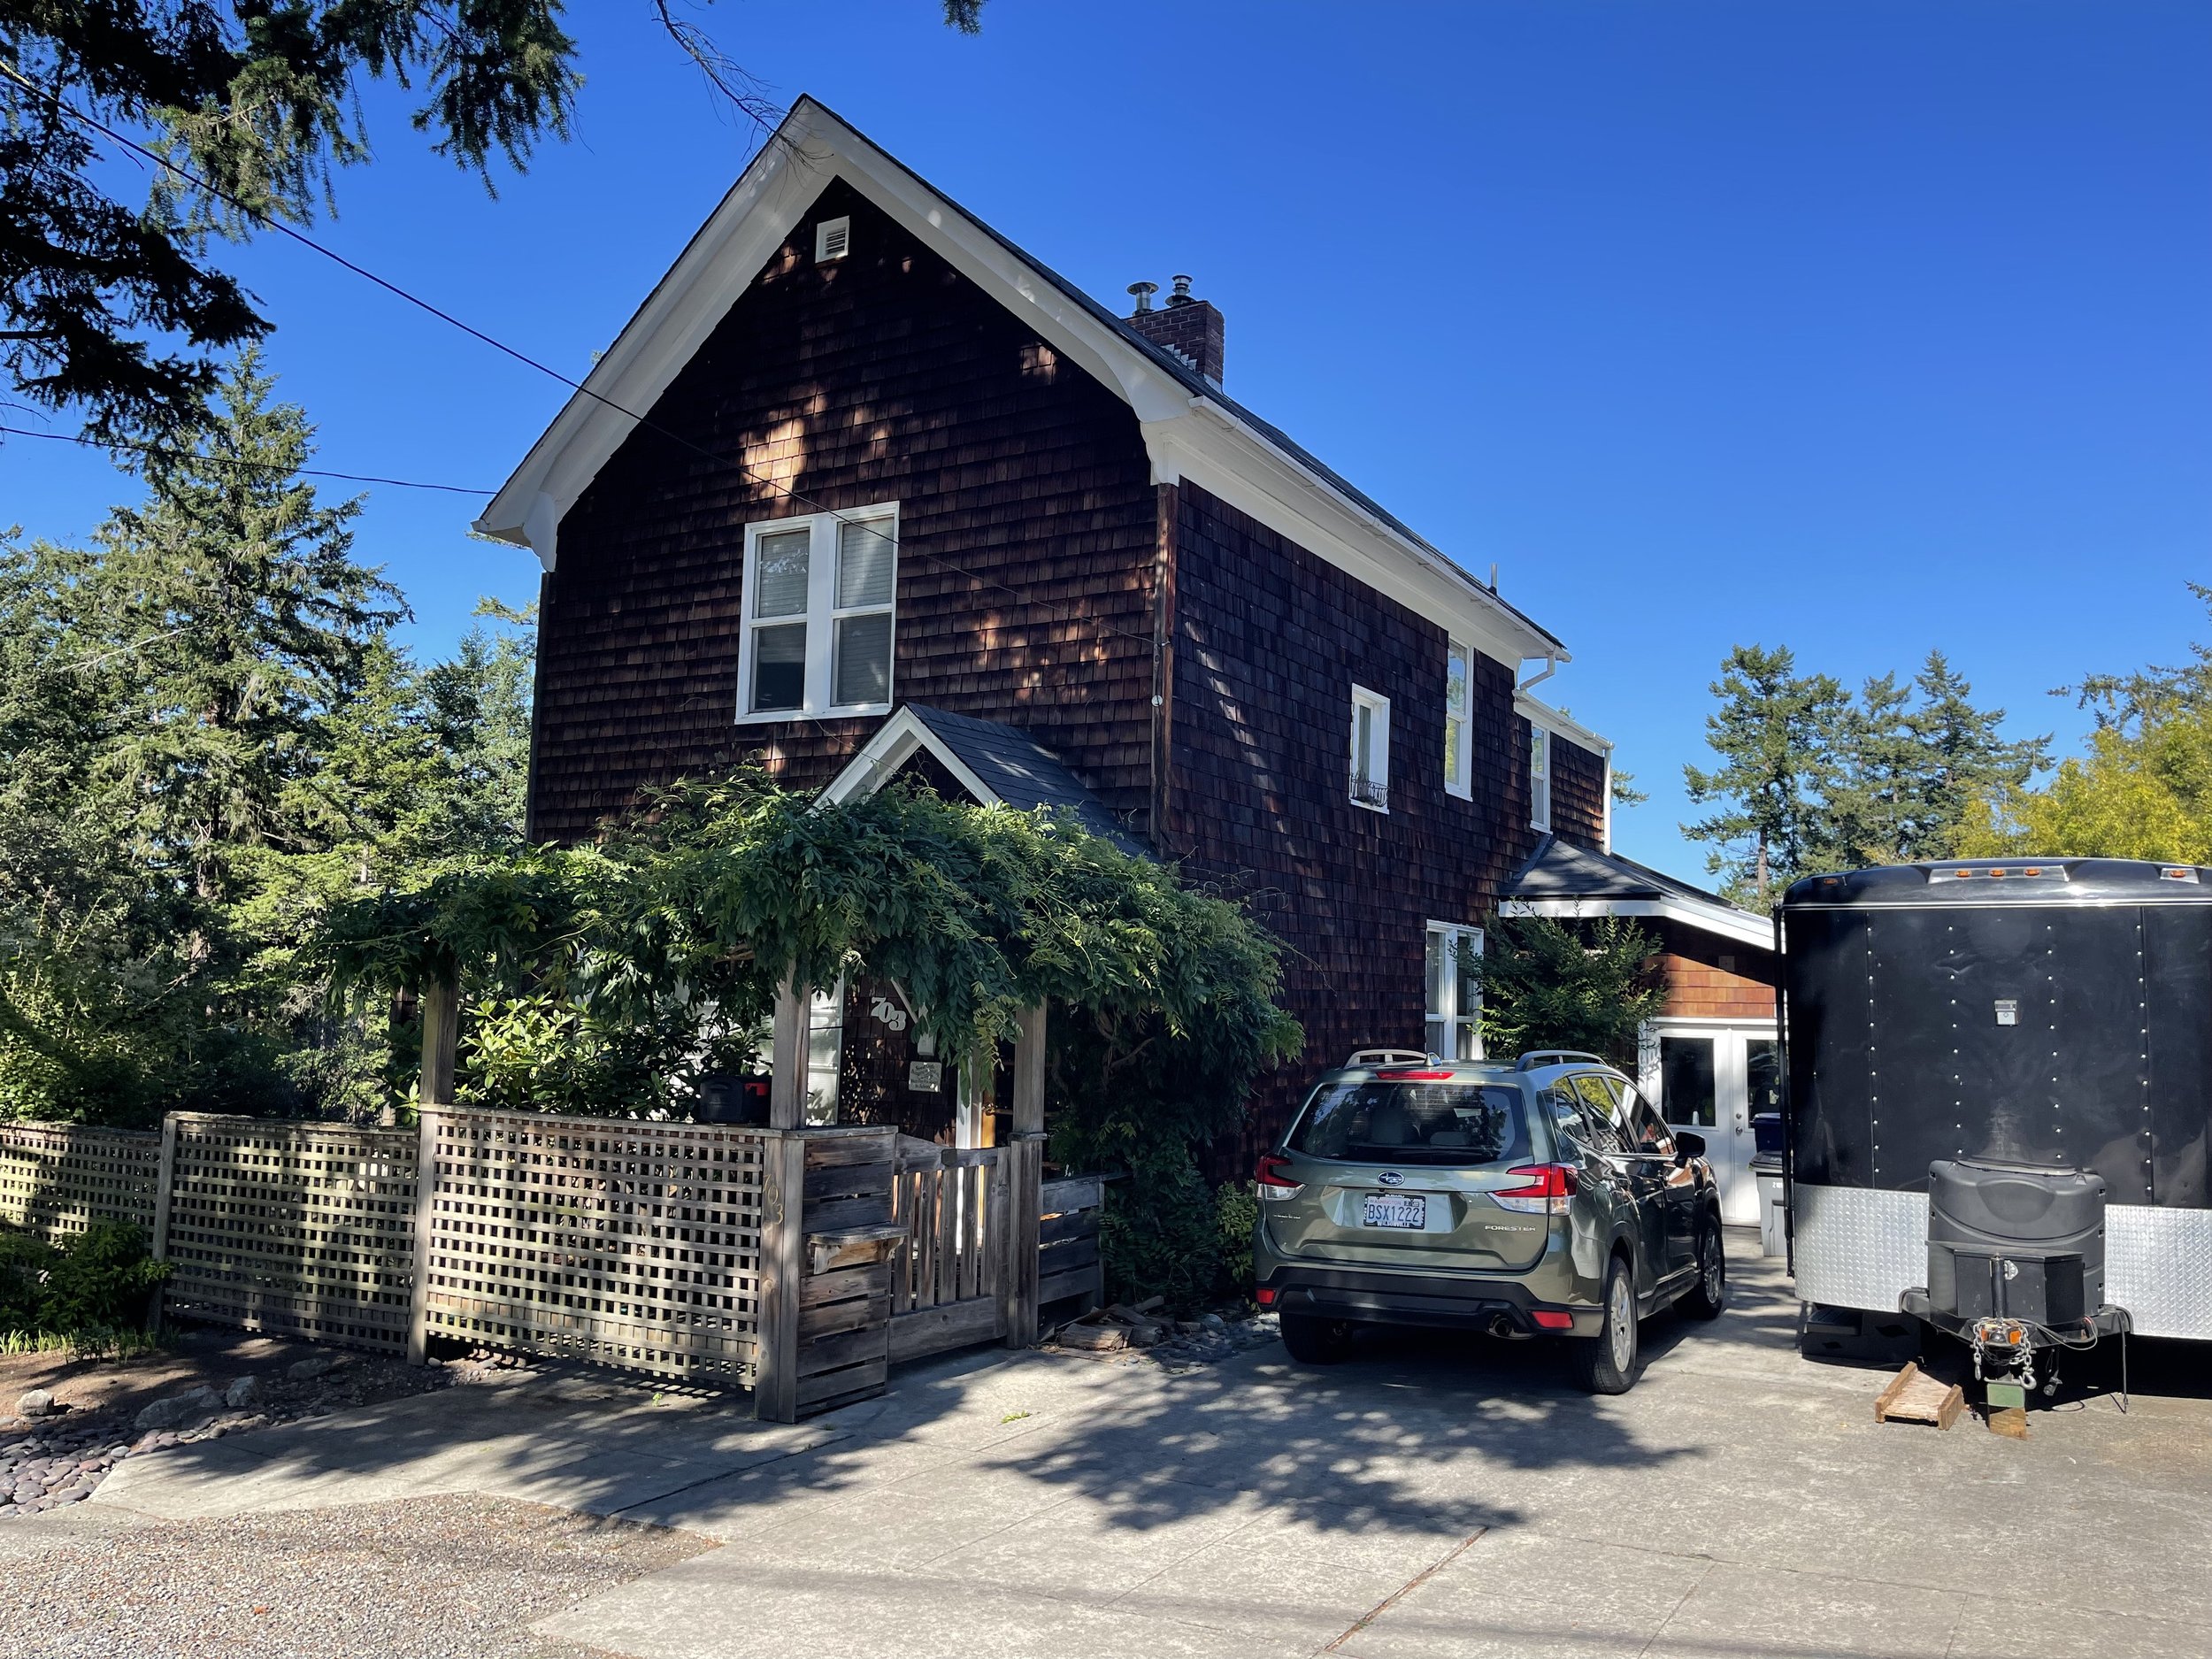
Here is the house as it is now.

This is looking up into the existing stairway.
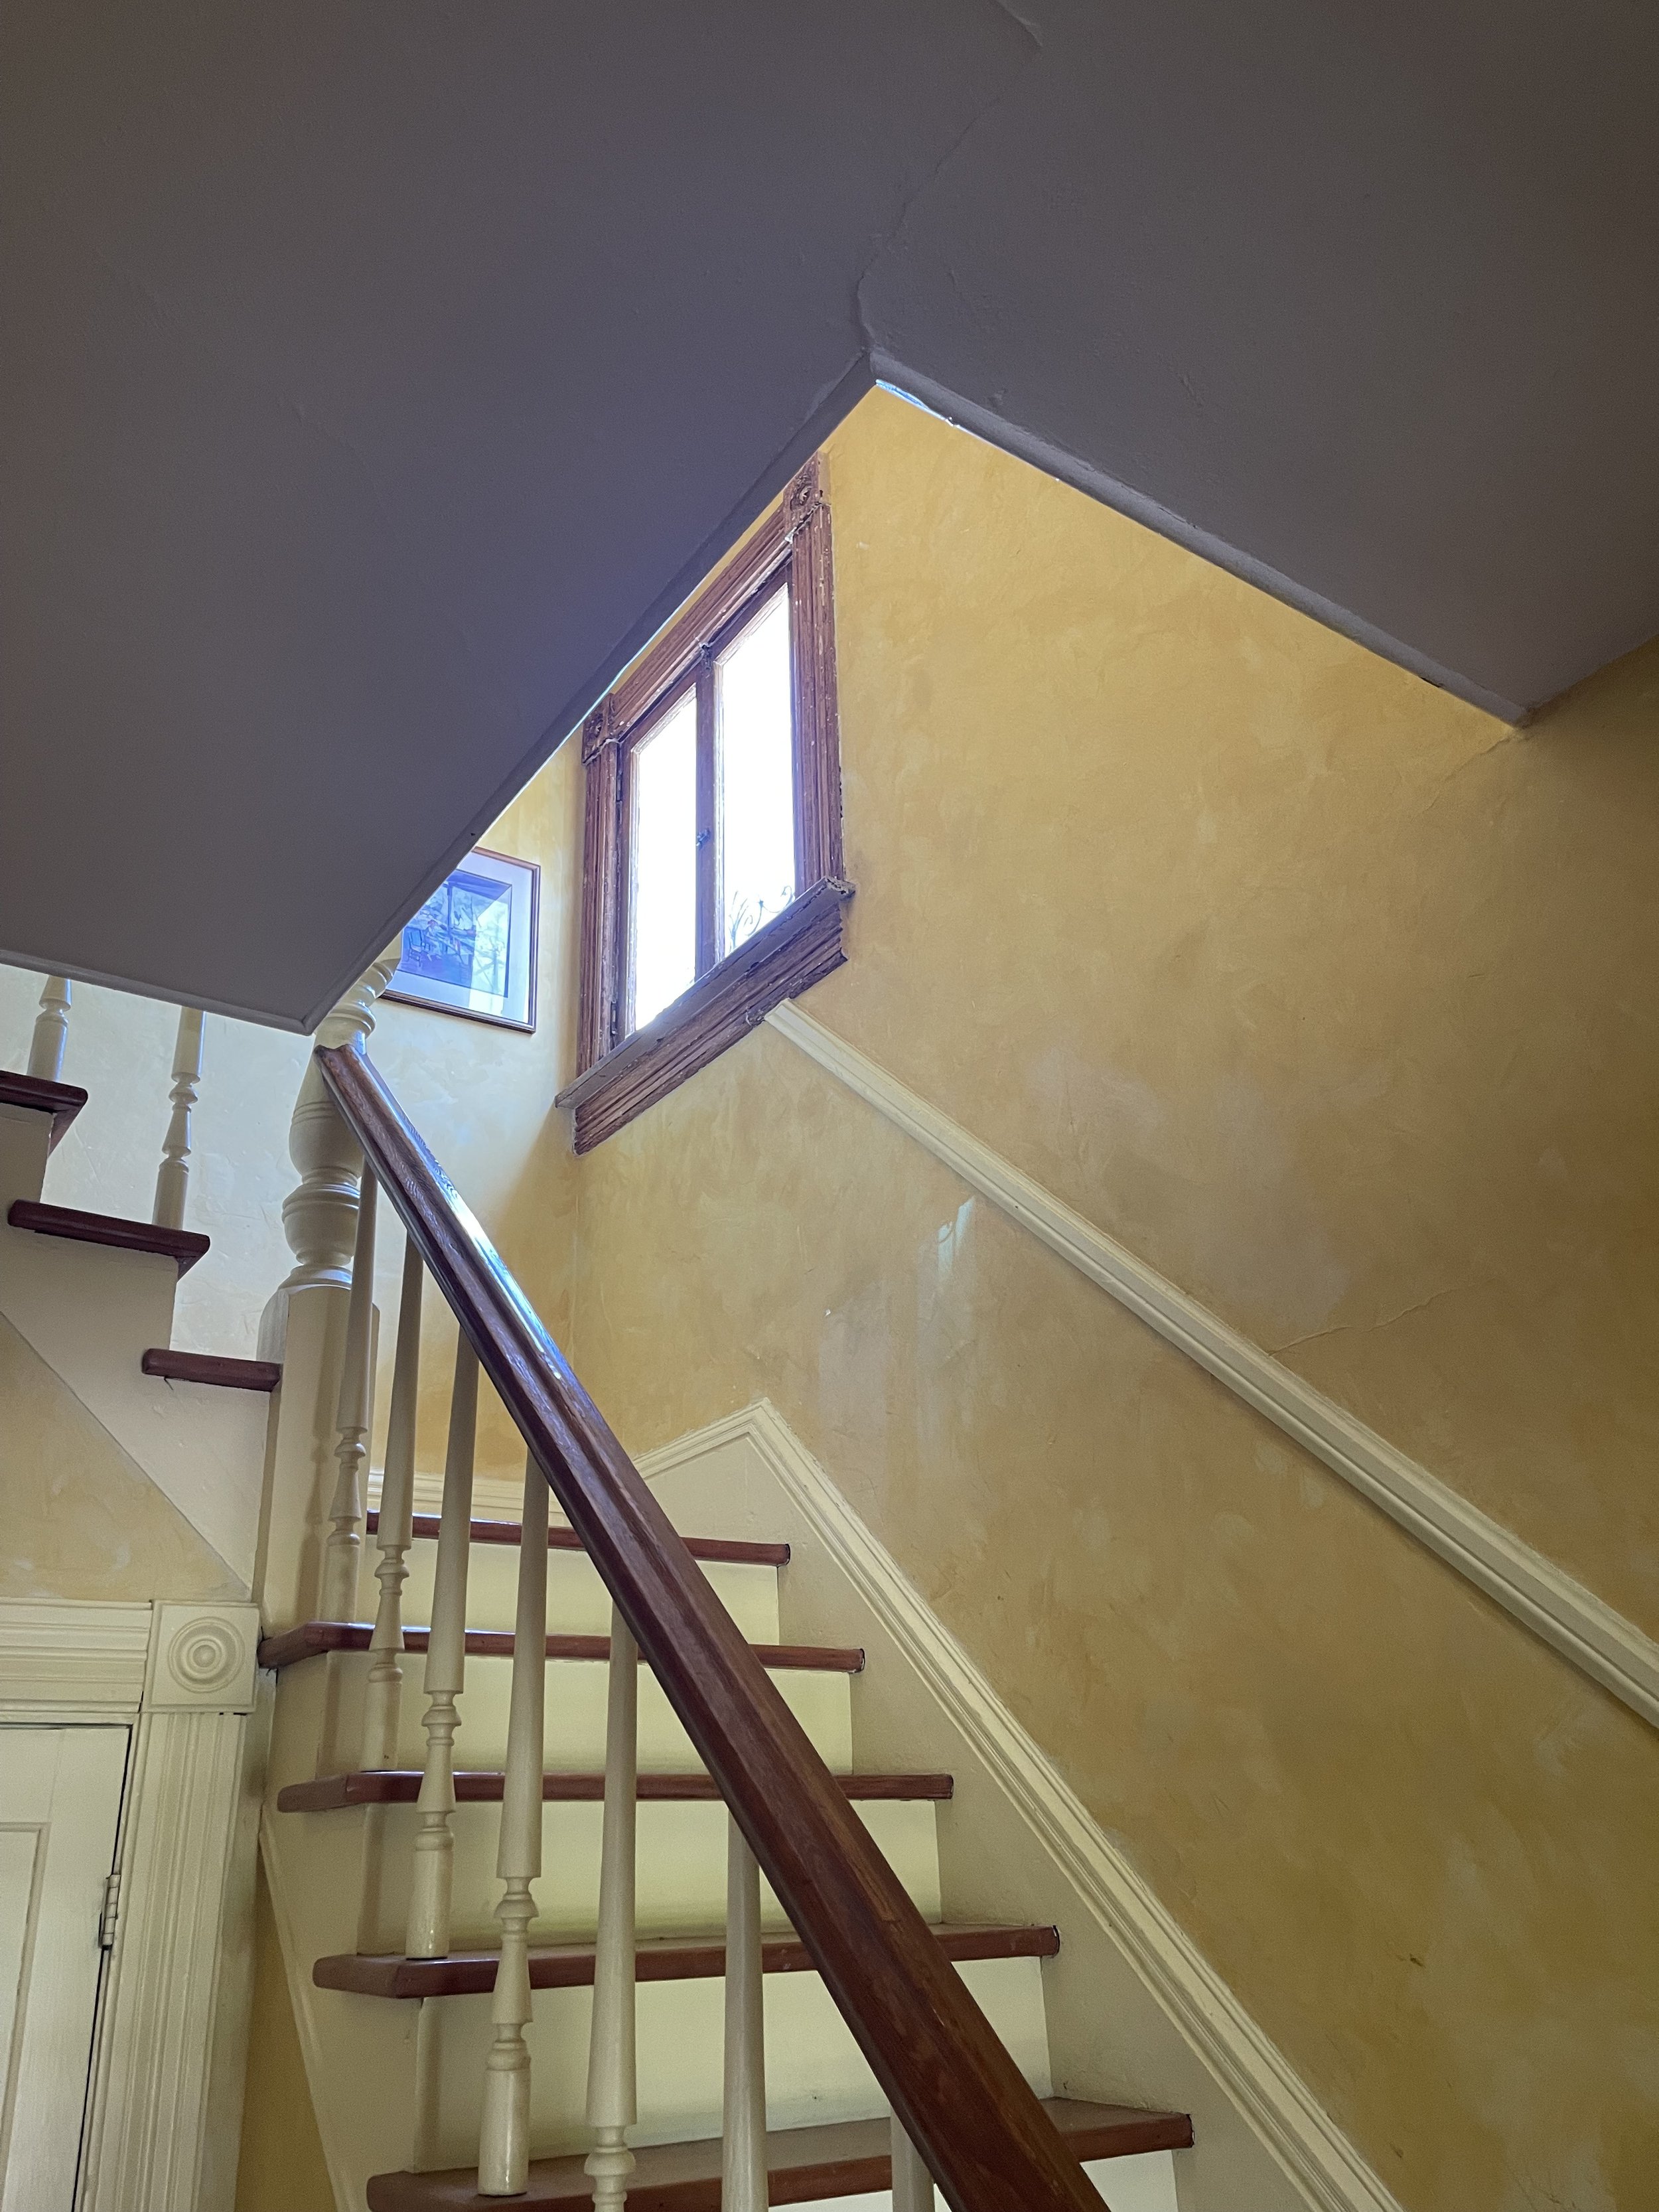
Existing stair

Right now, you open the front door and walk directly into this stair and it is tight. The new stair will turn the other direction and leave more space in the entry. You will be looking at the side of the staircase when you walk in. Much better Feng Shui! All the energy of the house will not be pulled out the front door!
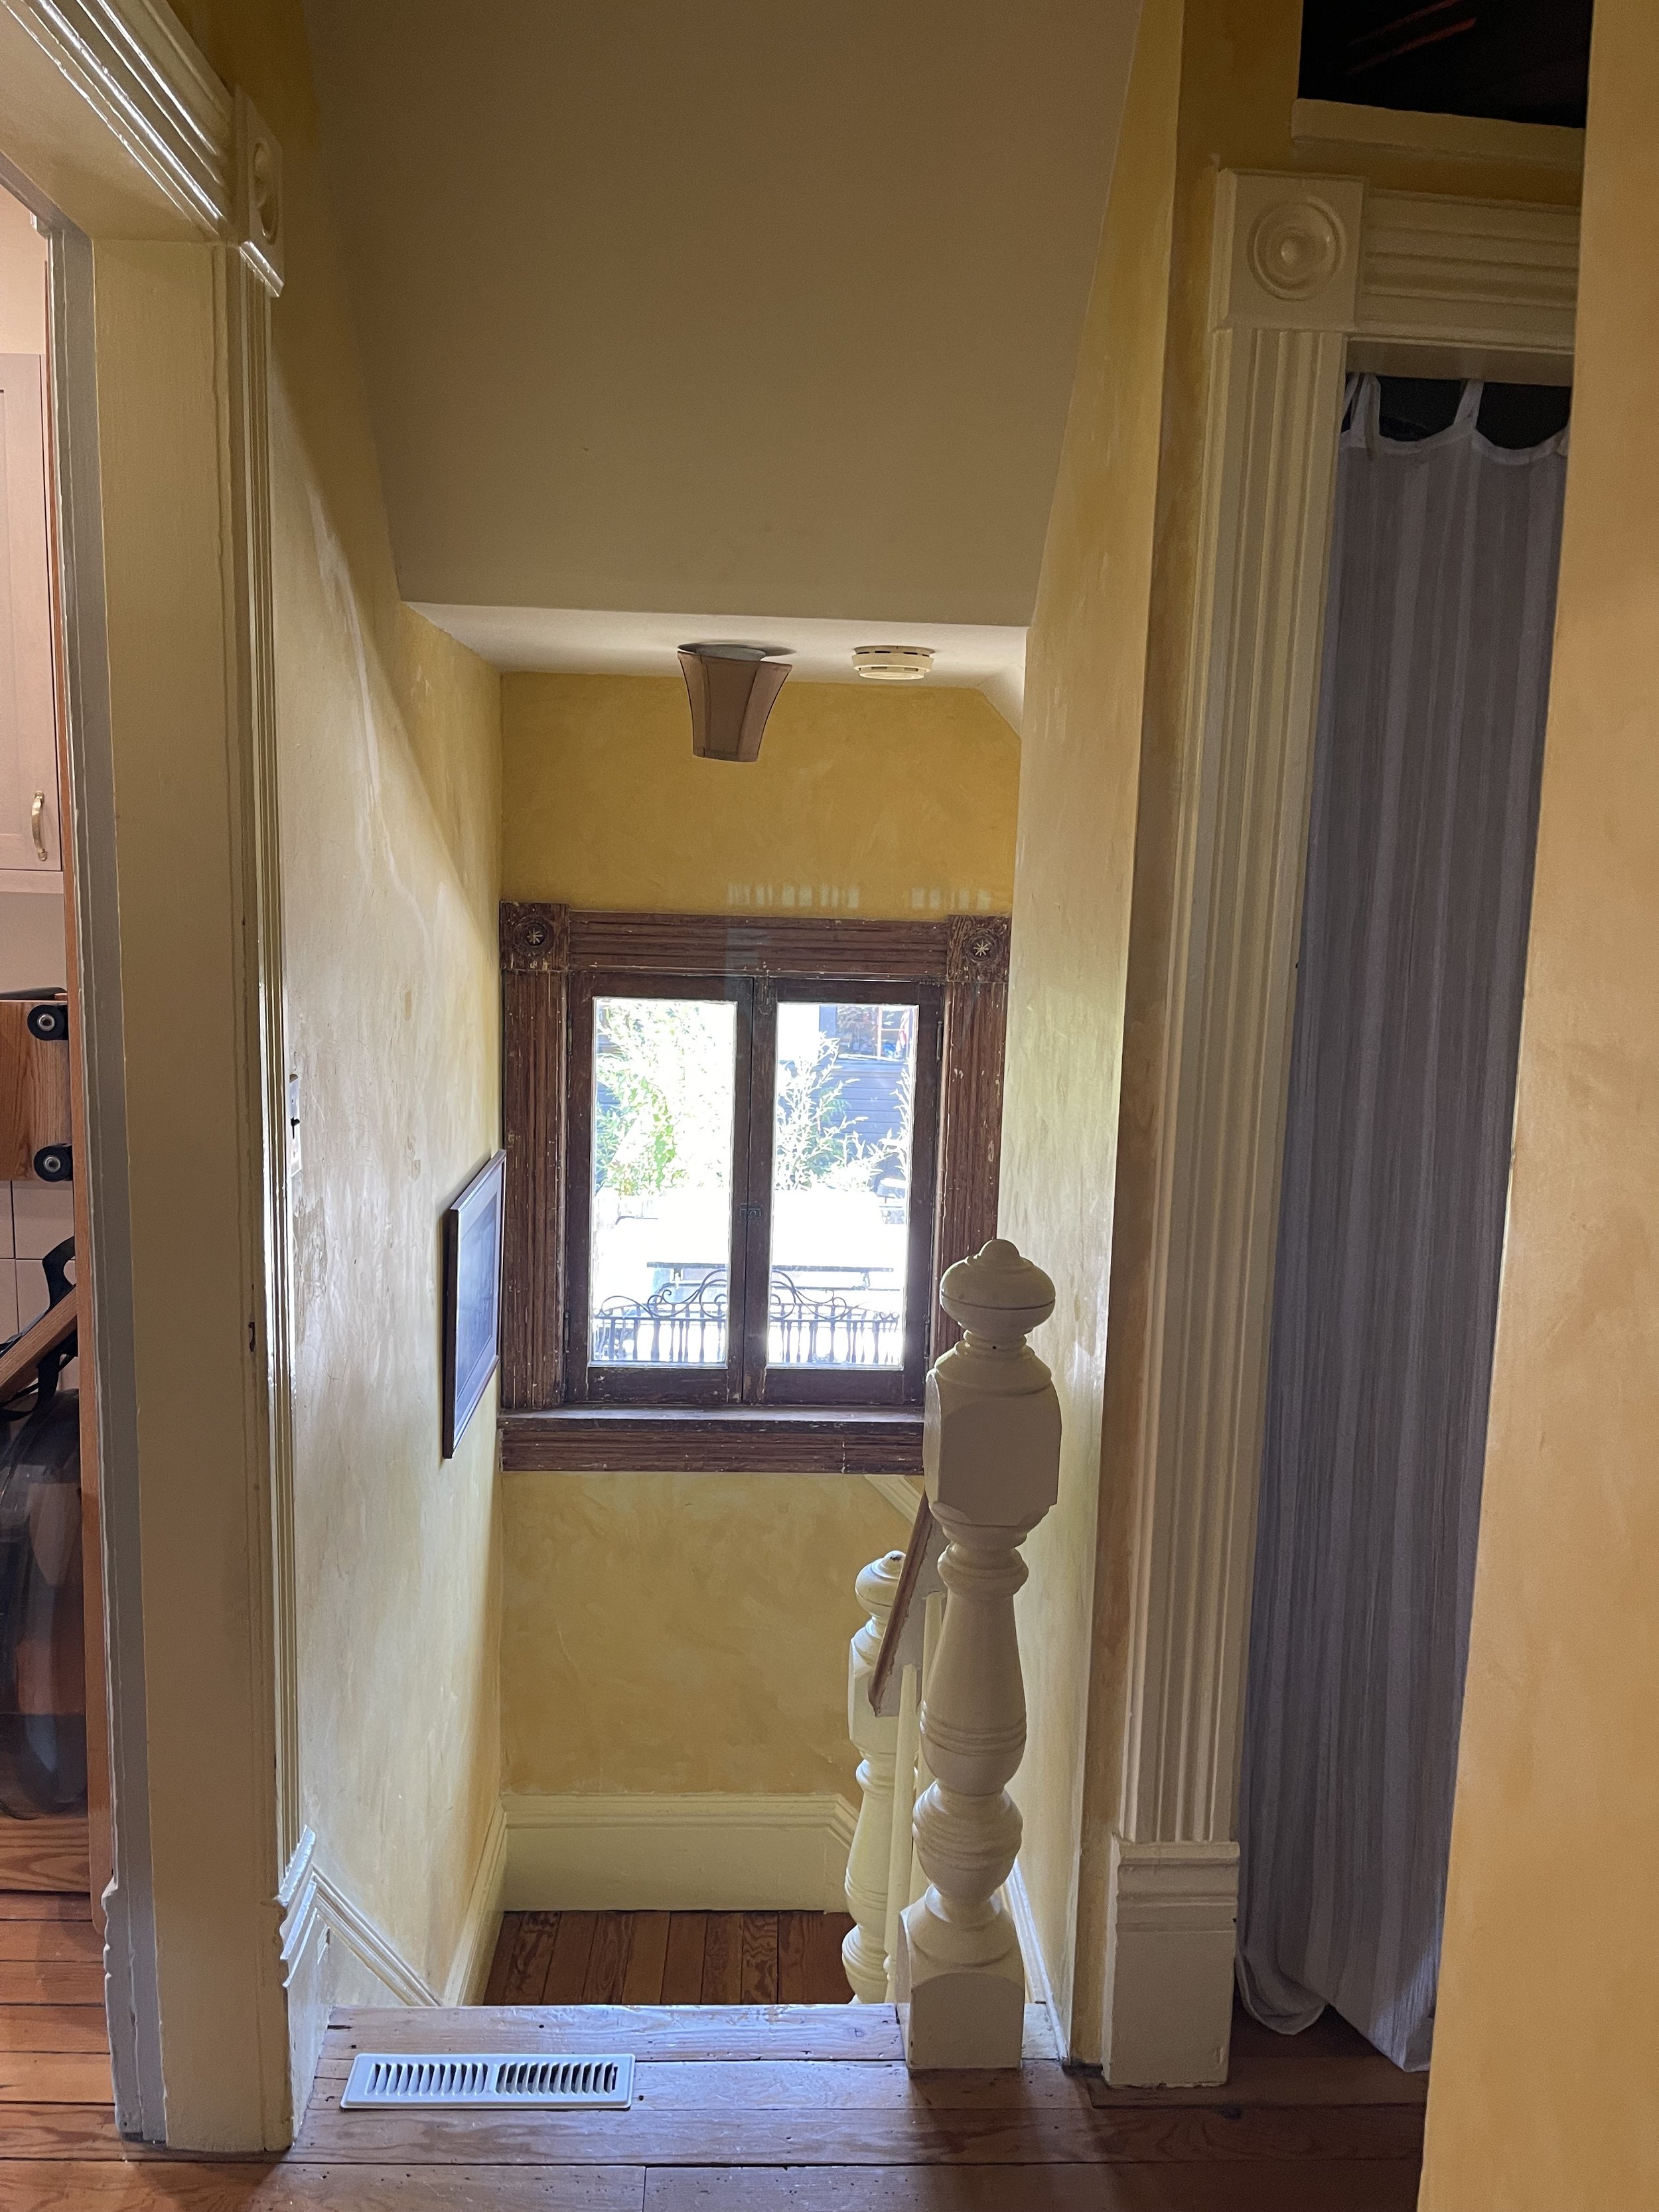
The big question is why the top of the stairway has a lowered ceiling that comes down? That has to be demoed out for this to work. Also, those balusters take up space and there is only 2’6” clearance between the balusters and the wall. People were smaller in 1905! The interior doors are all 24” wide! I am going to come up with a plan to re-use the balusters somehow in other places….to be continued:-)

Thinking that the new punch out should be in a different material to contrast with the existing shingles. There is a philosophy in Historic Preservation (and I do have a Masters in Historic Preservation from Columbia University in New York) that any additions should be evident as being new. This HArdi Plank Lap Siding in “Beavertail Brown” would blend in with the existing old weathered shingles and yet give a nice detail- what do you think?

Also the “Shou Sugi Ban”, almost black could look very handsome…..any votes?